
Course Description:
Welcome to the “Solang Solidity for Solana 201 Course: Build and Deploy a Fullstack SPL Token Minter dApp,” a cutting-edge journey into the realm of Solana blockchain development using Solang Solidity for Solana. This course is designed to take you through the comprehensive steps of building and deploying a full-stack decentralized application (dApp) that mints SPL tokens on the Solana blockchain.
Throughout this course, you will learn the intricacies of deploying Solana programs using Anchor, connecting those programs to a frontend application developed with modern frameworks like ReactJS/NextJS, and ultimately deploying your dApp for global access.
Each section of the course meticulously builds toward a capstone project – deploying a fully functional SPL Token Minter dApp, ensuring you gain hands-on experience with real-world applicability.
Seize this opportunity to delve into the deployment of Solana blockchain programs, frontend dApp integration, and the deployment of your dApp on platforms like Vercel or Netlify.
This course is tailored to enhance your blockchain development skills, focusing on Solidity for building within the Solana ecosystem using Solang.
No prior experience with Solana or blockchain development? No problem. This course is structured to accommodate learners at different levels, from beginners to intermediate developers interested in expanding their blockchain development skills.
What You Will Build & Deploy At The End Of This Course:
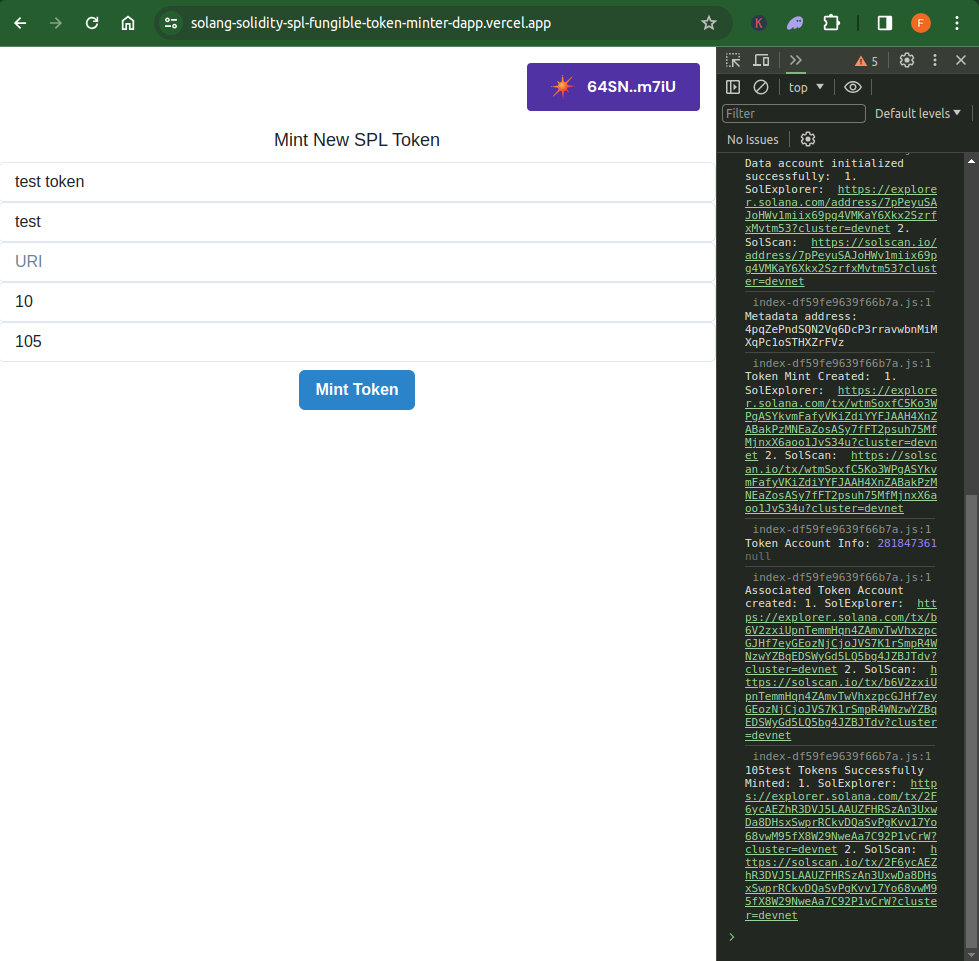
See the demo of the Fullstack Solang Solidity Solana SPL Token Minter dApp that you will learn to build from scratch and deploy in this course here: https://solang-solidity-spl-fungible-token-minter-dapp.vercel.app/
Course Content Delivery Format:
This course is delivered in 3 main formats to ensure a detailed and easy-to-consume yet comprehensive learning experience for our students:
- Text – Written step-by-step guide format
- Video – the written format is further supported with videos for each lesson to ensure students don’t just read but also see the course instructor walk things step by step in each lesson video.
- Code – Each lesson that requires it has code samples and a GitHub repo to support students’ learning
Earning Opportunities:
Yeah, this course is attached with earning opportunities as follows:
- $1,000 to be shared within the best 10 projects submitted by students after completing this course. See the Course Capstone project lesson for more details! This specific earning opportunity is valid for students’ projects submitted between 29th February – 26th March 2024 – Any further submission after that can earn certification but can’t qualify for earning.
- If you get inspired by this course and build a production-ready Solang Solidity-powered Solana dApp from your learning, then you have the opportunity to access a grant from our partner Superteam for up to $10,000. You can get started with the dPU Superteam Course to learn more.
DISCLOSURE:
We may hold, invest, trade or receive rewards/grants/bounty/tokens from reviewed/discussed web3 projects/affiliates (before, during or after this content was published).
DISCLAIMER:
All our contents at dProgramming University are for educational purposes only and do not constitute financial, trading, investment or development advice.
Please always do your own research (DYOR).
By using or following the whole or part of this content, you agree that we are not liable for any losses that you may suffer thereafter.
Why Choose This Course?
- Advanced Blockchain Focus: Dive deep into Solana blockchain development using Solang Solidity on Solana, a niche and high-demand skill set in the web3 domain.
- Progressive Project Building: Construct and deploy a Fullstack SPL Token Minter dApp from scratch, applying each new skill to a comprehensive project.
- AI-Enhanced Learning: Utilize cutting-edge AI tools to augment your learning and development process in web3.
- Beginner-Friendly Curriculum: Specifically designed for those new to full-stack dApp development.
- Real-World Application: Learn by doing with a course structure that mimics real-world blockchain development and deployment processes.
- Community and Expert Support: Engage with a vibrant community of learners and receive guidance from experienced web3 developers.
- Certification: Upon successful completion of the course lessons and project, you will receive a certificate of completion, which represents your skills and dedication.
Who Should Take This Course?
- Aspiring blockchain developers looking to specialize in Solana with Solang and Solidity.
- Web2 developers transitioning to the decentralized web.
- Non-developers, Entrepreneurs and enthusiasts interested in the technical side of web3.
- Anyone interested in the practical deployment of blockchain applications.
Prerequisites:
- Familiarity with blockchain technology is a essential.
- Understanding of how Solana Blockchain and SPL token works
- An interest in web3 technology and its transformative applications.
- A willingness to learn new concepts in a rapidly evolving tech landscape.
- Access to a computer and the internet for practical exercises and development setup.
Certification:
Complete the course lessons, tackle the practical exercises and pass the course project successfully to earn a certificate of completion.
This certificate is not just a testament to your dedication but also marks an important milestone in your web3 development journey as a web3/blockchain developer.
Enroll Now!
Do not miss this chance to unlock your potential as a blockchain developer and be at the forefront of the web3 revolution.
Embark on this transformative journey into Solana blockchain development with the “Solang Solidity for Solana 201 Course: Build and Deploy a Fullstack SPL Token Minter dApp.”
Course Outline:
The course is structured to provide a step-by-step guide through the development and deployment of a Solana blockchain-based dApp powered by Solang Solidity for Solana, Anchor, Web3js, Spl-token, Solana wallet adapter and a lot more.
The capstone project ensures that you gain practical, hands-on experience, cementing your learning and preparing you for real-world web3 development challenges.