Drift Protocol Tutorial For Developers Ep1: Build A Simple Application That Interacts with Drift APIs
1.0 Introduction
1.1 Overview Of Guide/Tutorial’s Goal
Helping Developers Understand Drift Protocol Development Lifecycle To Build Their First Drift Protocol SDK-powered dApp using Drift API and Nextjs
In this ultimate guide for Drift protocol development, I will take you by hand to guide you on how to build your first Drift API-powered dApp.
Yeah at the end of this guide, you will go from zero knowledge of Drift Protocol to developing with the Drift SDK and API.
In this guide, You will learn to develop a simple Nextjs dApp and then retrieve and display onchain data from Drift Perpetual Market by leveraging the Drift SDK and Drift APIs.

And in the future episodes, we will move to more intermediate and then advance Drift Protocol dApps development.
1.2 What You Will Build
Here is what you will build at the end of this guide (A Drift Perpetual Markets Data dApp):
Don’t worry if you have never heard of Drift Protocol or some of those aforementioned tech stacks before (nothing to fear 😀). I will cover them step by step with you all the way.
So, what are you waiting for?
Grab your Drift Dev hat and let Dev away (lol 🤨).
Meanwhile, even if you have never developed a Nextjs App before and just starting entirely, you are also covered too, because I ensured this is actually step-by-step with helpful resource recommendations for beginners and at the end,
you will have access to the full code repo to play around with and even have assignment to submit to horn your Drift Protocol development skills further.
1.3 Stuck? Get Support✋
I understand based on experience with developers that things can always break or get difficult to figure out, especially for beginners.
That is why you can get support for this content in just 2 steps:
STEP 1: Comment your questions below this guide to get support if get stuck (please avoid questions out of the context discussed here or they won’t be responded to)
STEP 2: Then join Discord below to alert me to check your questions (doing this ensures I can be aware of your comment to check and respond ASAP).
PLEASE avoid posting questions in Discord directly because I may not respond there. Asking here under the post directly as a comment and getting a response helps to ensure other developers going through the same issues can access the solution without repeatedly asking the same questions on Discord.
Join dProgrammingUniversity Discord Server – I have created a dedicated channel #Solana (under the BLOCKCHAINS category).
So, feel free to ask questions below in the comment section if you are stuck with this guide.
Follow me on X(Twitter)
DISCLOSURE:
We may hold, invest, trade or receive rewards/grants/bounty/tokens from reviewed/discussed web3 projects/affiliates (before, during or after this content was published).
DISCLAIMER:
All our contents at dProgramming University are for educational purposes only and do not constitute financial, trading, investment or development advice.
Please do your own research (DYOR).
By using or following the whole or part of this content, you agree that we are not liable for any losses that you may suffer thereafter.
2.0 Introduction To Drift Protocol
Yeah, I know that you are here to start deving😜 away with Drift Protocol, so feel free to skip to 3.0 if you are already familiar with the platform.
But, for a total newbie to Drift Protocol, it is important to know what it is all about first before building on it.
2.1 What is Drift Protocol Explained
Drift Protocol is a leading open-sourced perpetual trading-focused decentralized exchange (DEX) built on Solana.
Drift Protocol was launched in 2021 on Solana Blockchain with main focus leverage/futures trading onchain and has grown since launched to having about half a billion TVL.

It has also expanded to other features like predictions and a lot more to make DeFi experience more interesting to users.
If you would like to go in-depth into Drift Protocol, then I would suggest that you check out the ExploreWeb3 platform for detailed info about it at https://exploreweb3.xyz/projects/drift-protocol.
If you want to start using Drift Protocol,
You can do so (and use my referral link to register😍) via:
Register Account on Drift Protocol Website

3.0 Essential Tools and Resources for Drift Protocol Development
Below are essential tools and resources you need to build and develop Drift Protocol integrated dApps.
3.1 Drift Protocol Documentations
It is always recommended to go through the official documentation:
3.2 Drift Protocol API
If you would like to build dApps that integrate Drift Protocol, then it is essential for you to familiarize yourself with the Drift APIs:
3.3 Drift Protocol SDK
To make it easier for developers to have all essential packages and resources needed to easily integrate their dApps with Drift,
the team introduced the Drift Protocol SDK which has a lot of things like wallet, keypair, DriftClient and more preconfigured to make integration and communicating with the Drift API a breeze.
The Drift Protocol SDK is available for both JavaScript (Typescript) and Python:
3.4 Drift Protocol Common Issues And Fixes
When developing and integrating your dApp with Drift Protocol, there are some commonly known issues that might arise, below are some of them with suggested fixes based on my personal experience:
Kindly share others via comment below.
ERROR 1: “fs” module not found
SOLUTION:
I simply move the codes that interact with Drift Protocol SDK and API out of the frontend route into server-side rendering like API endpoint.
The cause of the issue is that there are lots of things being executed by the Drift SDK that is considered confidential and sensitive data like wallet keypair private key used to handle transactions.
So, most of these seems designed to run on the server-side not frontend to ensure those sensitive data are not easily leaked in the frontend.
Example moving the code from:
/app/DriftSDKCode.tsx
to
/app/api/DriftSDKCode/route.ts
Which ensures it runs server-side and not as frontend code.
ERROR 2: Keypair not found
SOLUTION:
Ensure that you are importing the keypair file correctly or using the correct keypair directly in your “.env.local” file.
Also, make use of the keypair loader function provided by the Drift SDK is setup correctly and working as expected or it could lead to errors.
4.0 Pre-Requisites For Drift Protocol Development
Before diving deep into developing your first Drift Protocol API powered dApp with Nextjs,
let’s quickly set up the required developer environment.
4.1 Nextjs-Powered Drift Protocol dApp Requirement
Meanwhile, having knowledge of the following will be helpful:
- Nextjs Development – As I mentioned earlier if you have never developed with Nextjs javascript framework before, then I have a Full-stack Web3 Frontend Development FREE Course you can take to help get started with it for free.
- Drift Protocol Account – If you have not explored the Drift Protocol website before, I believe that the best place to start Register an Account on Drift Protocol Website and familiarize yourself with the features. Also, you need to have an account to test and interact with some of the Drift Protocol API endpoints via the SDK.
- SOL Balance – You need to have some SOL in the wallet you want to use (on Devnet which is free – claim some Devnet SOL here). But if Mainnet, then you need to acquire real SOL for cash on exchanges.
4.2 Setting Up Development Environment for Drift Protocol dApp
Installing necessary tools and software
You will need to have the following installed on your computer.
NOTE: For this guide, I am using Linux OS (Ubuntu):
- Nodejs
- Node Package Manager – I prefer using PNPM over NPM and Yarn (use your preferred choice)
- IDE – VSCode, Cursor etc.
- Drift Protocol SDK (Essential to handle wallet keypair, interact with the Drift Protocol API and more easily)
- Solana Web3.js – (Though most things are already available via the Drift SDK, this is still needed for things like creating connections to Solana clusters like Mainnet, Devnet etc.)
5.0 VIDEO: Creating Your First Drift Protocol SDK/API Powered dApp (Drift Perpetual Markets Data dApp)
I have a step-by-step- video for this guide.
Watch me go through the Build Your First Drift Protocol (Drift Perpetual Markets Data) dApp With Nextjs in the video below:
6.0 Creating Your First Drift Protocol SDK/API Powered dApp (Drift Perpetual Markets Data dApp)
As promised earlier, I will not conclude this guide without you building your first Nextjs-powered app that can leverage Drift protocol SDK to retrieve and display data from the Drift API platform successfully.
Here we are, lets get started building Drift Drift Perpetual Markets Data dApp.
Shall we?🤔
In future episodes, we will then move on to building more intermediate and advanced projects using the Drift Protocol SDK and API.
6.1 Install Nextjs For Drift Protocol dApp Setup
Create a folder named
drift-perpetual-markets-data-dapp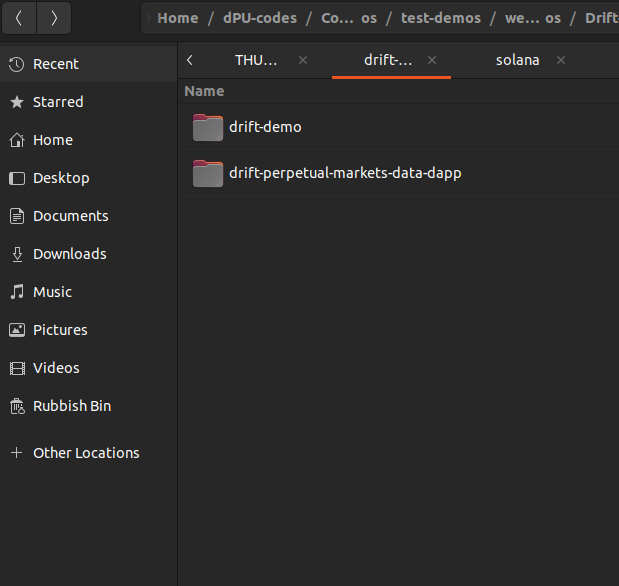
Open it and inside the “drift-perpetual-markets-data-dapp” folder, right-click to open in “Terminal”
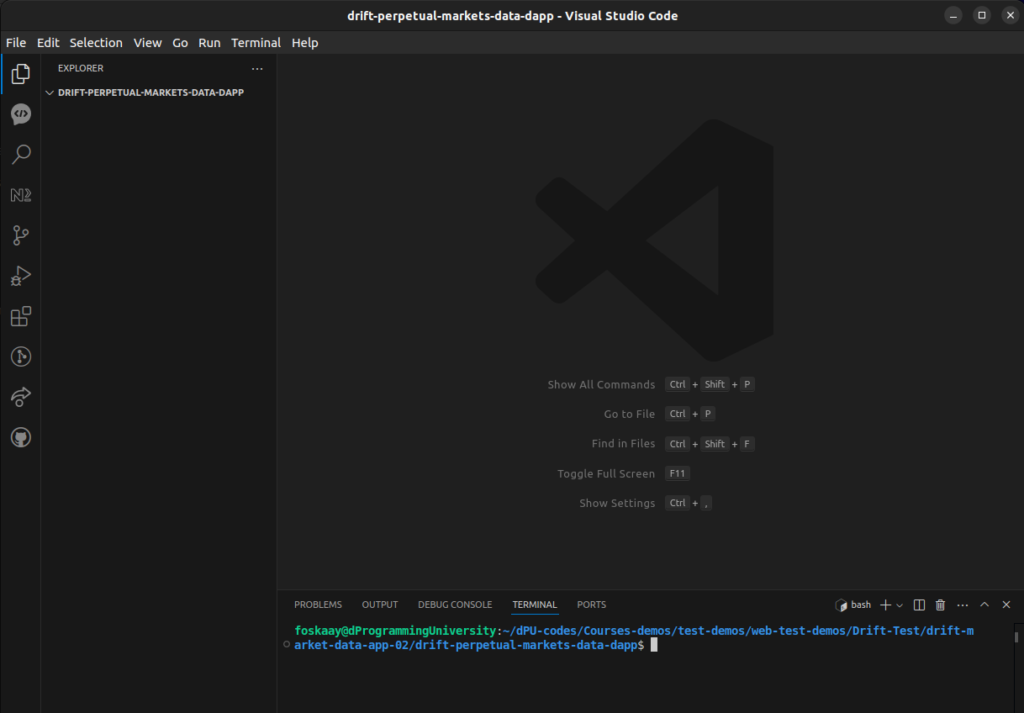
In the terminal, type command
code .This will open the “drift-perpetual-markets-data-dapp” project folder in VSCode as seen in the screenshot below:

In VSCode, open a new “Terminal” (Let’s call it “Terminal 1”) and install Nextjs following the instructions below:
Install Nextjs using the default setup with the command:
pnpx create-next-app .Select details as:
✔ Would you like to use TypeScript? - Yes
✔ Would you like to use ESLint? - Yes
✔ Would you like to use Tailwind CSS? - Yes
✔ Would you like to use `src/` directory? - No
✔ Would you like to use App Router? (recommended) - Yes
✔ Would you like to customize the default import alias (@/*)? - No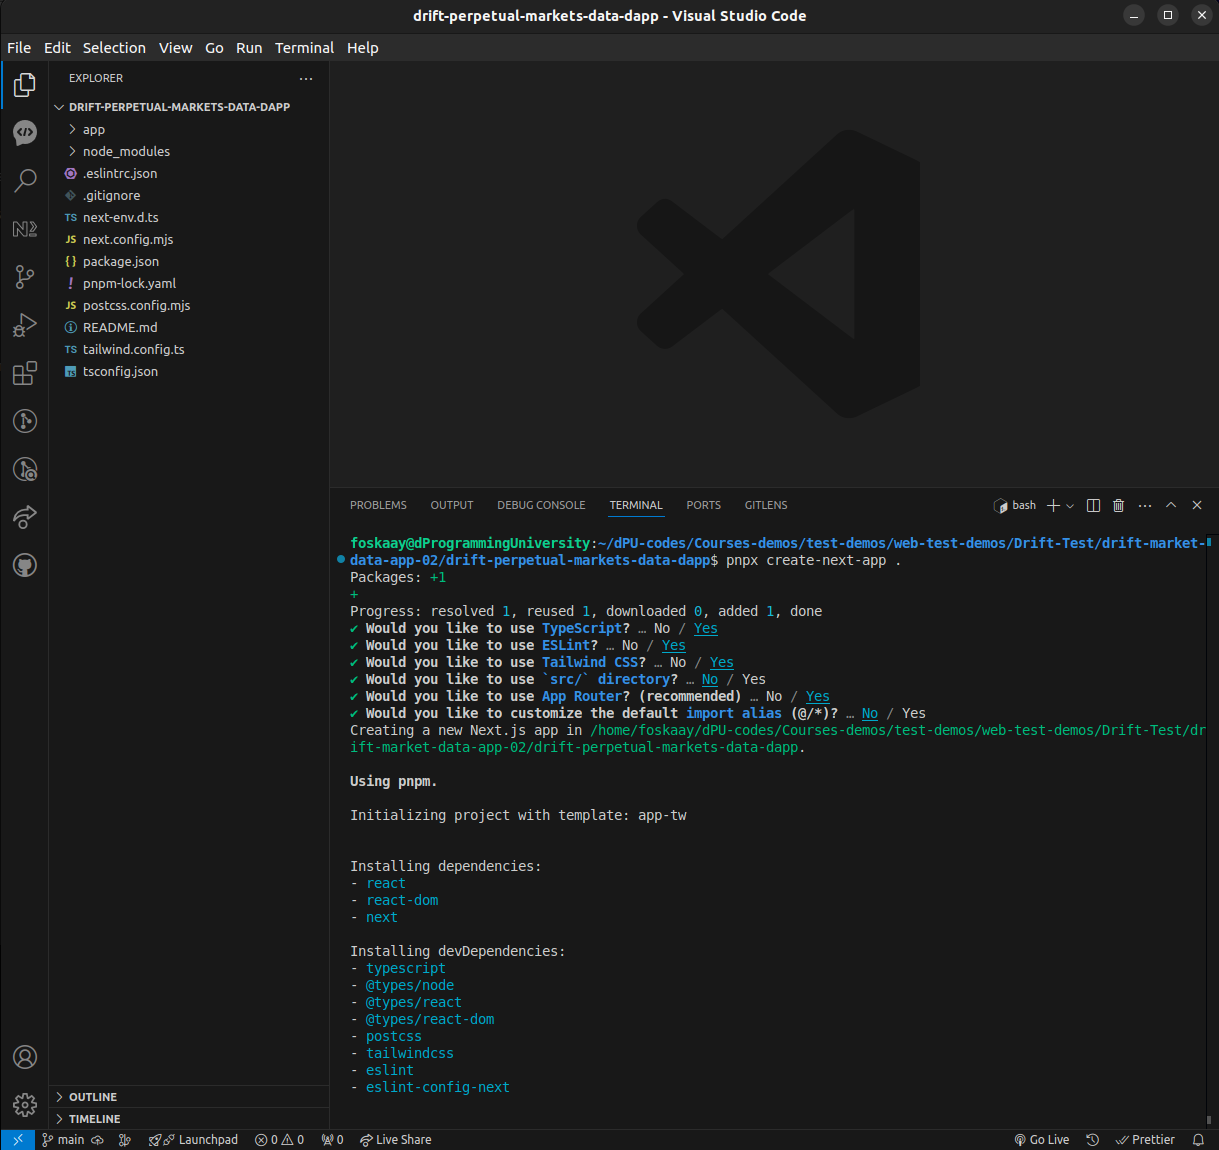
Then confirm all packages installed with the command:
pnpm iYou should see something like this in your terminal:
Lockfile is up to date, resolution step is skipped
Already up to date
Done in 651ms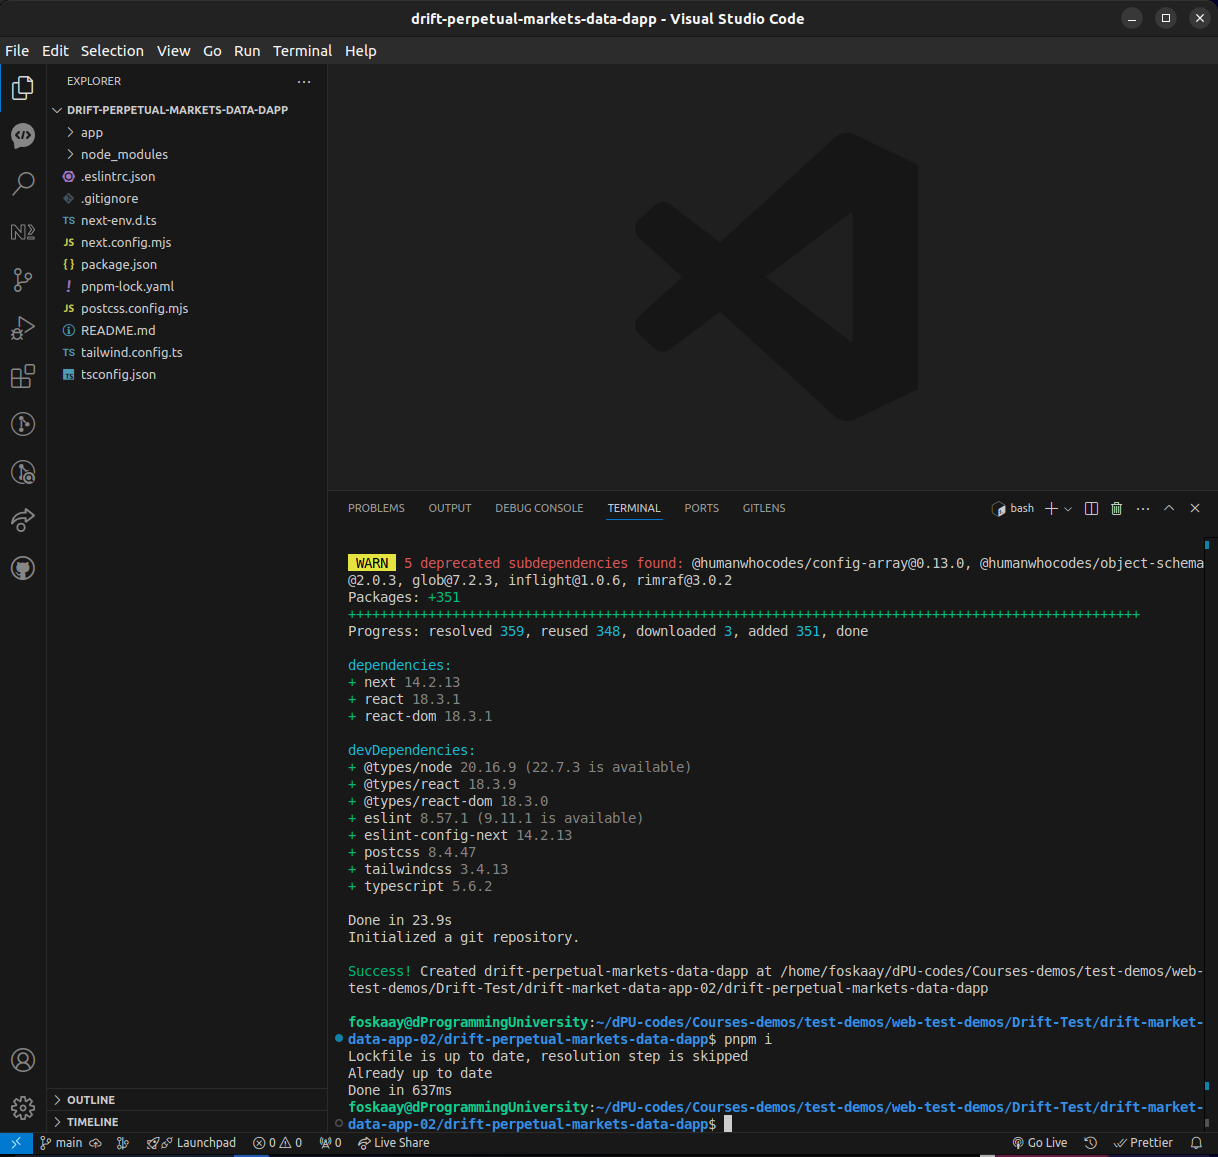
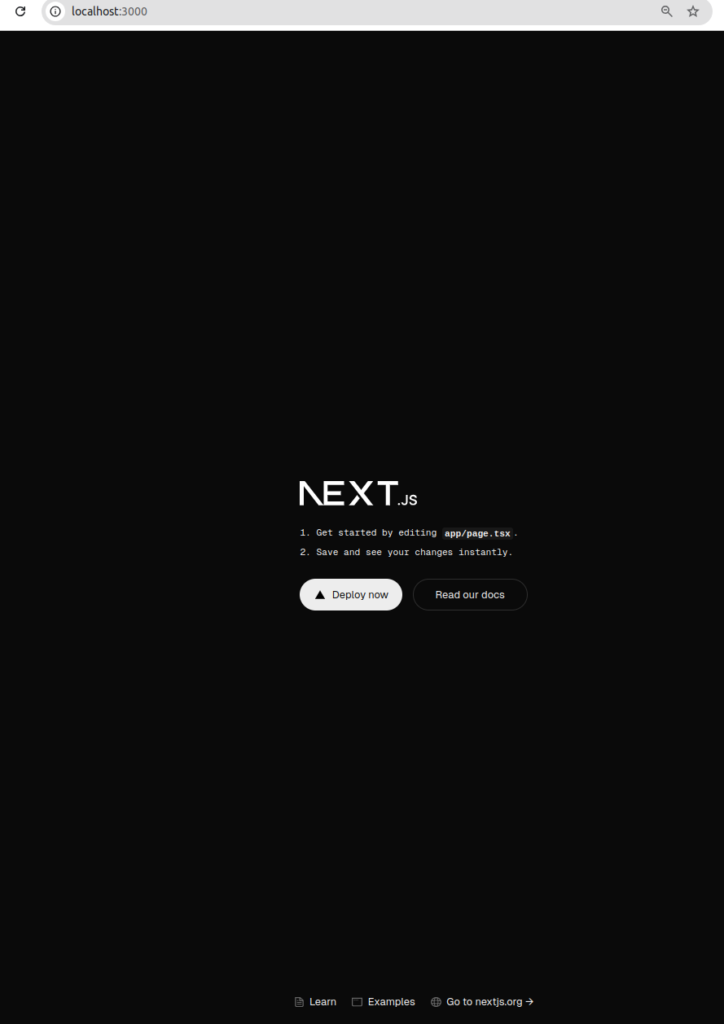
Run the Nextjs “drift-perpetual-markets-data-dapp” project dev server to preview it with the command (open second terminal “Terminal 2”):
pnpm devOpen the project in your browser:
http://localhost:3000

(if this port is busy)
it will use other available ports like

http://localhost:3001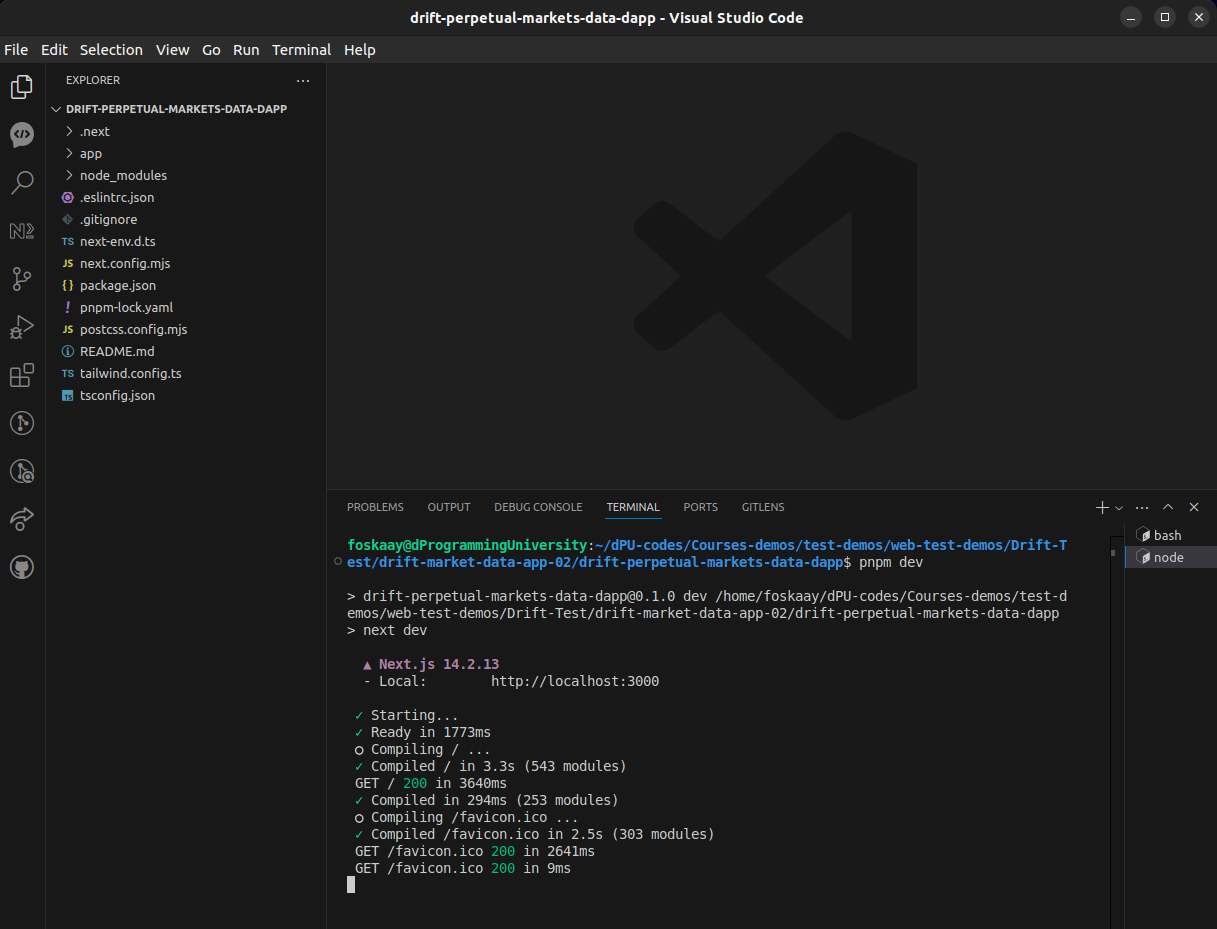
NOTE:
Moving forward, kindly leave “Terminal 2” running the “pnpm dev” server as above and continue to use “Terminal 1” for other commands below to ensure you don’t have to kill the server and restart multiple times to install other packages.
For now, you should have the default Nextjs page loaded (if error, kindly ensure this is fixed before proceeding to the next steps)
7.0 Install Essential Node Packages For Drift Protocol dApp Development
Before we move on, there are other essential node packages that need to be installed as follows:
- Solana Web3.js
- Drift Protocol SDK
- Framer Motion (Optional – only install if using animation in your design. We use it in this guide to add animation effects to the card and mouse movements)
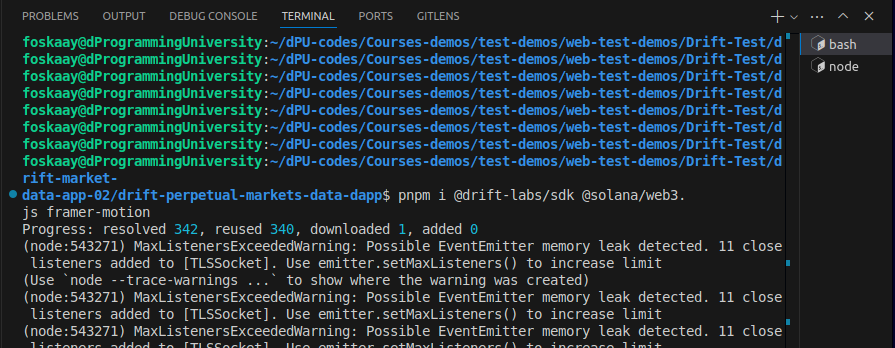
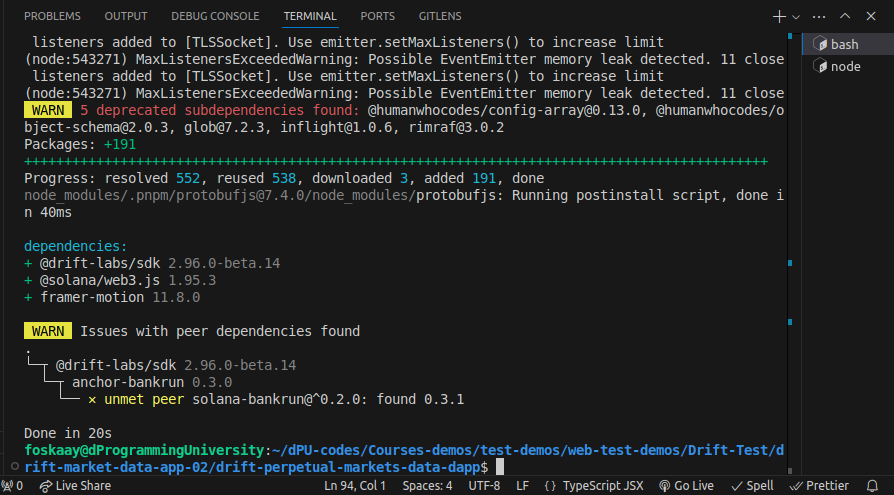
You can install the packages above with the following commands:
pnpm i @drift-labs/sdk @solana/web3.js framer-motion
8.0 Turn Nextjs App To Drift Protocol dApp
Yeah, let’s transform our Nextjs to a Drift Perpetual Markets Data dApp,
Where we will fetch and display the Drift protocol API data in nice beautify cards.
8.1. Drift Perpetual Markets Data dApp Homepage Code
You can replace your default Nextjs homepage “/app/page.tsx” code with:
// /app/page.tsx
import DriftData from '@/components/DriftData';

export default function Home() {
  return (
    <main className="flex min-h-screen flex-col items-center justify-between p-8 bg-gray-100 dark:bg-gray-900">
      <div className="z-10 w-full max-w-6xl items-center justify-between font-mono text-sm">
        <h1 className="text-4xl font-bold mb-8 text-center text-blue-600 dark:text-blue-400">Drift Protocol Demo</h1>
        <DriftData />
      </div>
    </main>
  );
}
8.2. Drift Perpetual Markets Data dApp Card Component Code
You may need to create a new “components” folder if not existing in the root folder of your Nextjs app already.
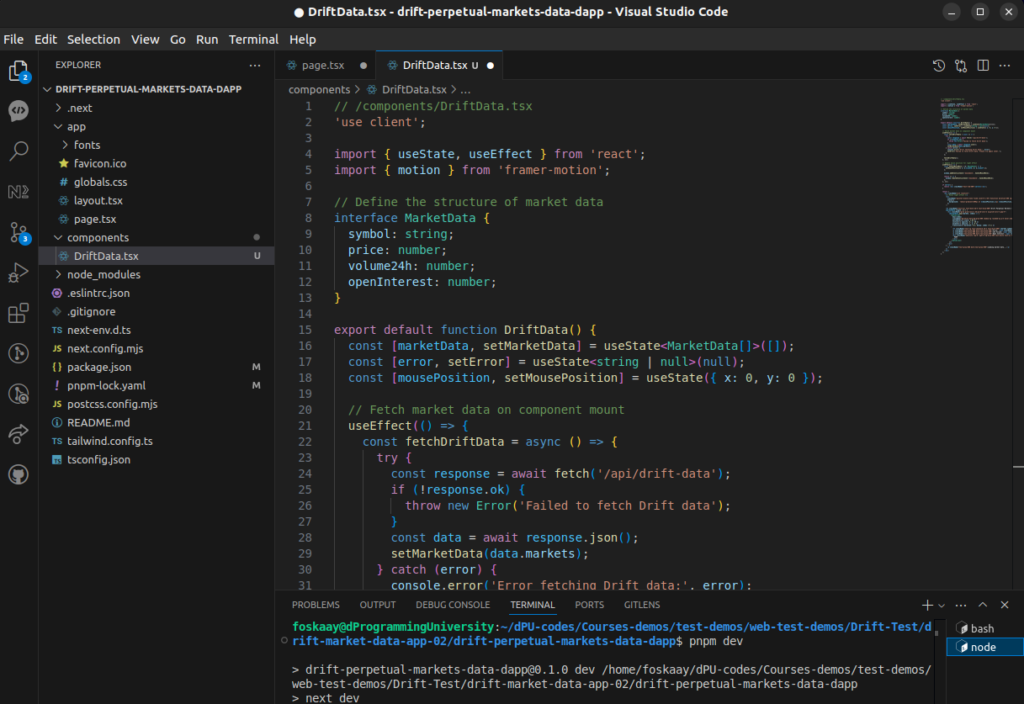
Create a new component file “DriftData.tsx” and copy-paste the code below in it to handle the display of the Drift Perpetual Markets Data App as a card:
// /components/DriftData.tsx
'use client';

import { useState, useEffect } from 'react';
import { motion } from 'framer-motion';

// Define the structure of market data
interface MarketData {
  symbol: string;
  price: number;
  volume24h: number;
  openInterest: number;
}

export default function DriftData() {
  const [marketData, setMarketData] = useState<MarketData[]>([]);
  const [error, setError] = useState<string | null>(null);
  const [mousePosition, setMousePosition] = useState({ x: 0, y: 0 });

  // Fetch market data on component mount
  useEffect(() => {
    const fetchDriftData = async () => {
      try {
        const response = await fetch('/api/drift-data');
        if (!response.ok) {
          throw new Error('Failed to fetch Drift data');
        }
        const data = await response.json();
        setMarketData(data.markets);
      } catch (error) {
        console.error('Error fetching Drift data:', error);
        setError('Failed to fetch Drift data. Please try again later.');
      }
    };

    fetchDriftData();
  }, []);

  // Update mouse position for light effect
  useEffect(() => {
    const handleMouseMove = (e: MouseEvent) => {
      setMousePosition({ x: e.clientX, y: e.clientY });
    };

    window.addEventListener('mousemove', handleMouseMove);

    return () => {
      window.removeEventListener('mousemove', handleMouseMove);
    };
  }, []);

  if (error) {
    return <div className="text-red-500">{error}</div>;
  }

  return (
    <div className="p-4 relative">
      {/* Mouse light effect */}
      <div
        className="pointer-events-none fixed inset-0 z-30 transition duration-300 lg:absolute"
        style={{
          background: `radial-gradient(600px at ${mousePosition.x}px ${mousePosition.y}px, rgba(29, 78, 216, 0.15), transparent 80%)`,
        }}
      />

      <h2 className="text-2xl font-bold mb-4 text-blue-600">Drift Perpetual Markets</h2>
      {marketData.length > 0 ? (
        <div className="grid grid-cols-1 md:grid-cols-2 lg:grid-cols-3 gap-4">
          {marketData.map((market, index) => (
            <motion.div
              key={index}
              className="bg-white dark:bg-gray-800 shadow-lg rounded-lg p-4 hover:shadow-xl transition-all duration-300 relative overflow-hidden"
              whileHover={{ scale: 1.05 }}
              initial={{ opacity: 0, y: 20 }}
              animate={{ opacity: 1, y: 0 }}
              transition={{ duration: 0.3, delay: index * 0.1 }}
            >
              <h3 className="text-lg font-semibold mb-2 text-blue-500">{market.symbol}</h3>
              <p className="text-gray-600 dark:text-gray-300">Price: <span className="font-bold text-green-500">${market.price.toFixed(2)}</span></p>
              <p className="text-gray-600 dark:text-gray-300">24h Volume: <span className="font-bold text-purple-500">${market.volume24h.toLocaleString()}</span></p>
              <p className="text-gray-600 dark:text-gray-300">Open Interest: <span className="font-bold text-orange-500">{market.openInterest.toLocaleString()}</span></p>
              <div className="absolute top-0 right-0 bg-blue-500 text-white text-xs font-bold px-2 py-1 rounded-bl-lg">
                PERP
              </div>
            </motion.div>
          ))}
        </div>
      ) : (
        <p className="text-gray-600 dark:text-gray-400">Loading market data...</p>
      )}
    </div>
  );
}
8.3. Drift Perpetual Markets Data dApp (Drift API) Page Code
Next is creating the API route to handle the integration of Drift Protocol into the project.
Create a new folder if not available in the “/app” directory name “api”:
/app/api
Then create a new folder “drift-data” inside it:
/app/api/drift-data
Then, create a new API route file “route.ts” inside it:
/app/api/drift-data/route.ts
Finally, create the Drift SDK code to interact with the Drift API to retrieve Drift Perpetual Market data as below:
8.3.1 Stage 1: API Route Structure and Solana Connection
In this first stage, we will create the basic API route and initialize a connection to the Solana devnet.
Instructions:
- Create the API route in
/app/api/drift-data/route.ts. - This code initializes a connection to the Solana devnet and returns a simple success message.
- Ensure you have the
NEXT_PUBLIC_RPC_URLset in your.env.localfile.
// /app/api/drift-data/route.ts
import { NextResponse } from 'next/server';
import { Connection } from '@solana/web3.js';

export async function GET() {
  console.log('Starting GET request to /api/drift-data');
  try {
    // Initialize connection to Solana devnet
    const rpcUrl = process.env.NEXT_PUBLIC_RPC_URL || 'https://api.devnet.solana.com';
    console.log('RPC URL:', rpcUrl);
    const connection = new Connection(rpcUrl);
    console.log(`Solana ${connection.rpcEndpoint} connection established successfully`);

    return NextResponse.json({ message: 'Solana connection established' });
  } catch (error) {
    console.error('Error establishing connection:', error);
    return NextResponse.json({ error: 'Failed to establish connection' }, { status: 500 });
  }
}
8.3.2 Stage 2: Loading the Keypair
In this stage, we will add the functionality to load the keypair from the environment variables. This keypair will be used to authenticate the wallet that interacts with Drift.
Instructions:
- Add the above code after the connection setup in Stage 1.
- This code loads the keypair file path from the environment variables and checks if it is found. If not, it throws an error.
- Make sure the
NEXT_PUBLIC_KEYPAIRis set correctly in your.env.localfile.
// Add this code below the connection setup in the existing file from Stage 1

// Load the keypair from the environment variable
const keypairFile = process.env.NEXT_PUBLIC_KEYPAIR;
console.log('Keypair file path:', keypairFile);
if (!keypairFile) {
  throw new Error('Keypair path not found in environment variables');
}
8.3.3 Stage 3: Creating the Wallet Instance
Next, we will use the loaded keypair to create a wallet instance that will be used to interact with the Solana blockchain and Drift Protocol.
Instructions:
- Add this code below the keypair loading section from Stage 2.
- This creates a wallet instance using the
loadKeypairfunction from the Drift SDK, which reads the keypair from the file path. - Ensure that your
keypairfile is correctly set up in your.env.localenvironment file.
// Add this code below the keypair loading code in the file from Stage 2

import { Wallet, loadKeypair } from '@drift-labs/sdk';

// Create wallet instance
console.log('Loading keypair...');
const wallet = new Wallet(loadKeypair(keypairFile));
console.log('Wallet created successfully with public key:', wallet.publicKey.toString());
8.3.4 Stage 4: Initializing the Drift Client
At this point, we will initialize the Drift client, which will use the connection and wallet we created earlier to interact with Drift Protocol.
Instructions:
- Add this code below the wallet creation section from Stage 3.
- This initializes the Drift client using the
connectionandwallet, setting the environment todevnet.
// Add this code below the wallet creation code in the file from Stage 3

import { DriftClient } from '@drift-labs/sdk';

// Initialize Drift client
console.log('Initializing Drift client...');
const driftClient = new DriftClient({
  connection,
  wallet,
  env: 'devnet',
});
console.log('Drift client initialized successfully');
8.3.5 Stage 5: Fetching Drift Protocol Enhanced Market Data
Finally, we will add the logic to fetch enhanced market data from Drift’s perpetual markets and return it as a JSON response.
Instructions:
- Add this code below the Drift client initialization from Stage 4.
- This fetches market data from Drift Protocol and returns it in a formatted JSON response.
// Add this code below the Drift client initialization code in the file from Stage 4

import { PerpMarkets, PerpMarketConfig } from '@drift-labs/sdk';

// Interface for the enhanced market data
interface EnhancedMarketData {
  symbol: string;
  price: number;
  volume24h: number;
  openInterest: number;
}

// Fetch enhanced market data
console.log('Fetching enhanced perpetual market data...');
const enhancedMarketData: EnhancedMarketData[] = await Promise.all(
  PerpMarkets['devnet'].map(async (market: PerpMarketConfig) => {
    const perpMarket = driftClient.getPerpMarketAccount(market.marketIndex);
    const price = perpMarket ? perpMarket.amm.historicalOracleData.lastOraclePriceTwap.toNumber() : 0;
    const volume24h = perpMarket ? perpMarket.amm.volume24H.toNumber() : 0;
    const openInterest = perpMarket ? perpMarket.amm.baseAssetAmountWithAmm.toNumber() : 0;

    return {
      symbol: market.symbol,
      price: price / 1e6, // Convert to standard units
      volume24h: volume24h / 1e6, // Convert to standard units
      openInterest: openInterest / 1e9, // Convert to standard units
    };
  })
);
console.log('Fetched enhanced market data:', enhancedMarketData);

return NextResponse.json({ markets: enhancedMarketData });
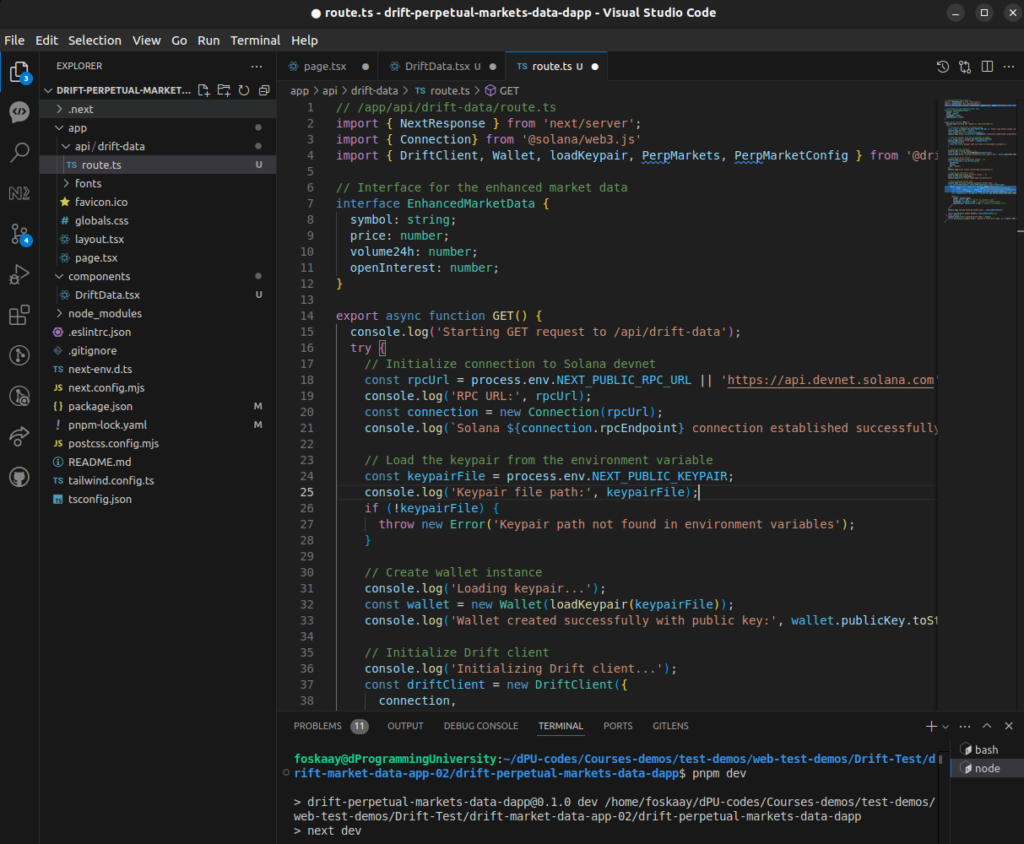
8.3.6 Stage 6: Full Drift Protocol API Route Code
If you have followed the above stages step by step, you should now have a full code for the Drift API route as follows:
// /app/api/drift-data/route.ts
import { NextResponse } from 'next/server';
import { Connection} from '@solana/web3.js'
import { DriftClient, Wallet, loadKeypair, PerpMarkets, PerpMarketConfig } from '@drift-labs/sdk';

// Interface for the enhanced market data
interface EnhancedMarketData {
  symbol: string;
  price: number;
  volume24h: number;
  openInterest: number;
}

export async function GET() {
  console.log('Starting GET request to /api/drift-data');
  try {
    // Initialize connection to Solana devnet
    const rpcUrl = process.env.NEXT_PUBLIC_RPC_URL || 'https://api.devnet.solana.com';
    console.log('RPC URL:', rpcUrl);
    const connection = new Connection(rpcUrl);
    console.log(`Solana ${connection.rpcEndpoint} connection established successfully`);

    // Load the keypair from the environment variable
    const keypairFile = process.env.NEXT_PUBLIC_KEYPAIR;
    console.log('Keypair file path:', keypairFile);
    if (!keypairFile) {
      throw new Error('Keypair path not found in environment variables');
    }

    // Create wallet instance
    console.log('Loading keypair...');
    const wallet = new Wallet(loadKeypair(keypairFile));
    console.log('Wallet created successfully with public key:', wallet.publicKey.toString());

    // Initialize Drift client
    console.log('Initializing Drift client...');
    const driftClient = new DriftClient({
      connection,
      wallet,
      env: 'devnet',
    });
    console.log('Drift client initialized successfully');

    // Initialize the Drift client
    console.log('Subscribing to Drift client...');
    await driftClient.subscribe();
    console.log('Drift client subscribed successfully');

    // Fetch enhanced market data
    console.log('Fetching enhanced perpetual market data...');
    const enhancedMarketData: EnhancedMarketData[] = await Promise.all(
      PerpMarkets['devnet'].map(async (market: PerpMarketConfig) => {
        const perpMarket = driftClient.getPerpMarketAccount(market.marketIndex);
        const price = perpMarket ? perpMarket.amm.historicalOracleData.lastOraclePriceTwap.toNumber() : 0;
        const volume24h = perpMarket ? perpMarket.amm.volume24H.toNumber() : 0;
        const openInterest = perpMarket ? perpMarket.amm.baseAssetAmountWithAmm.toNumber() : 0;

        return {
          symbol: market.symbol,
          price: price / 1e6, // Convert to standard units
          volume24h: volume24h / 1e6, // Convert to standard units
          openInterest: openInterest / 1e9, // Convert to standard units
        };
      })
    );
    console.log('Fetched enhanced market data:', enhancedMarketData);

    return NextResponse.json({ markets: enhancedMarketData });
  } catch (error) {
    console.error('Error fetching Drift data:', error);
    return NextResponse.json({ error: 'Failed to fetch Drift data' }, { status: 500 });
  }
}
9.0 Testing Your Nextjs Drift Perpetual Markets Data dApp
Yeah, now that you have your Drift Perpetual Markets Data dApp ready, it is time to test.
But before we can test successfully, we have one more very important thing to do.
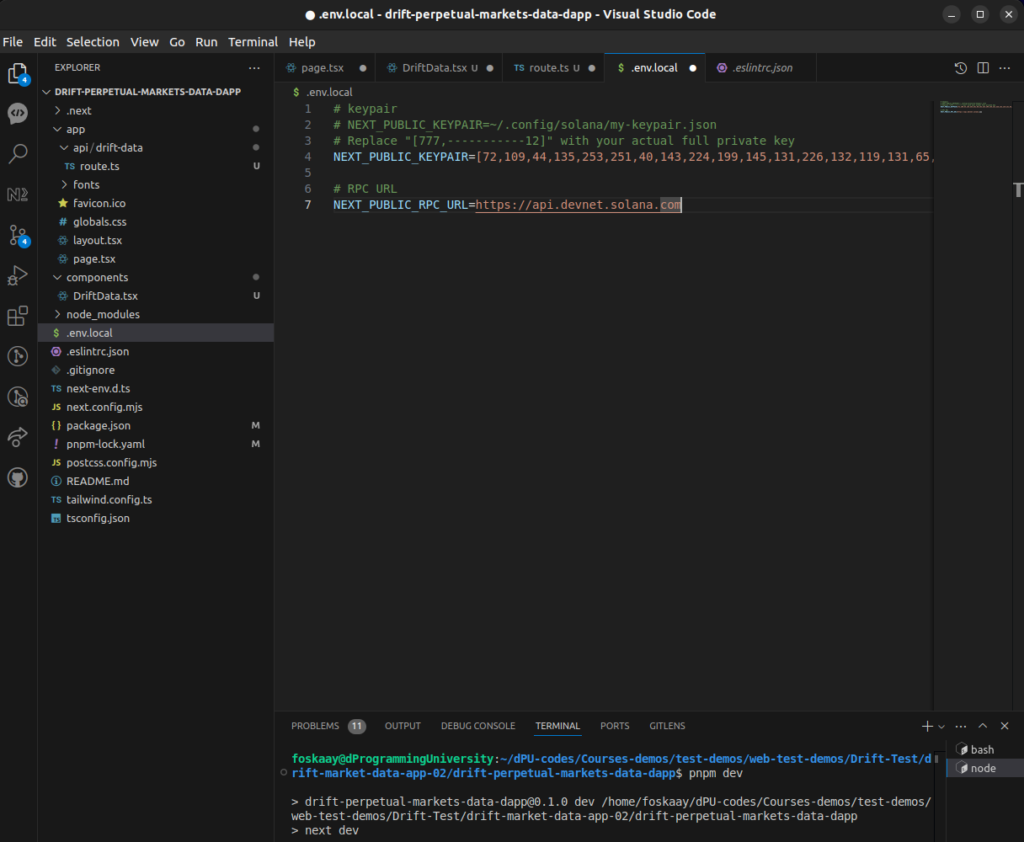
That is to set up the keypair private key (and since this is confidential data, the best option is to set up a .env.local file)
Create a new file “.env.local” in the root folder of our project and put the following code (And remember to never reveal your private key or seed phrase to anyone or push publicly via git commit):
# keypair
# NEXT_PUBLIC_KEYPAIR=~/.config/solana/my-keypair.json
# Replace "[777,-----------12]" with your actual full private key
NEXT_PUBLIC_KEYPAIR=[777,-----------12]

# RPC URL
NEXT_PUBLIC_RPC_URL=https://api.devnet.solana.com
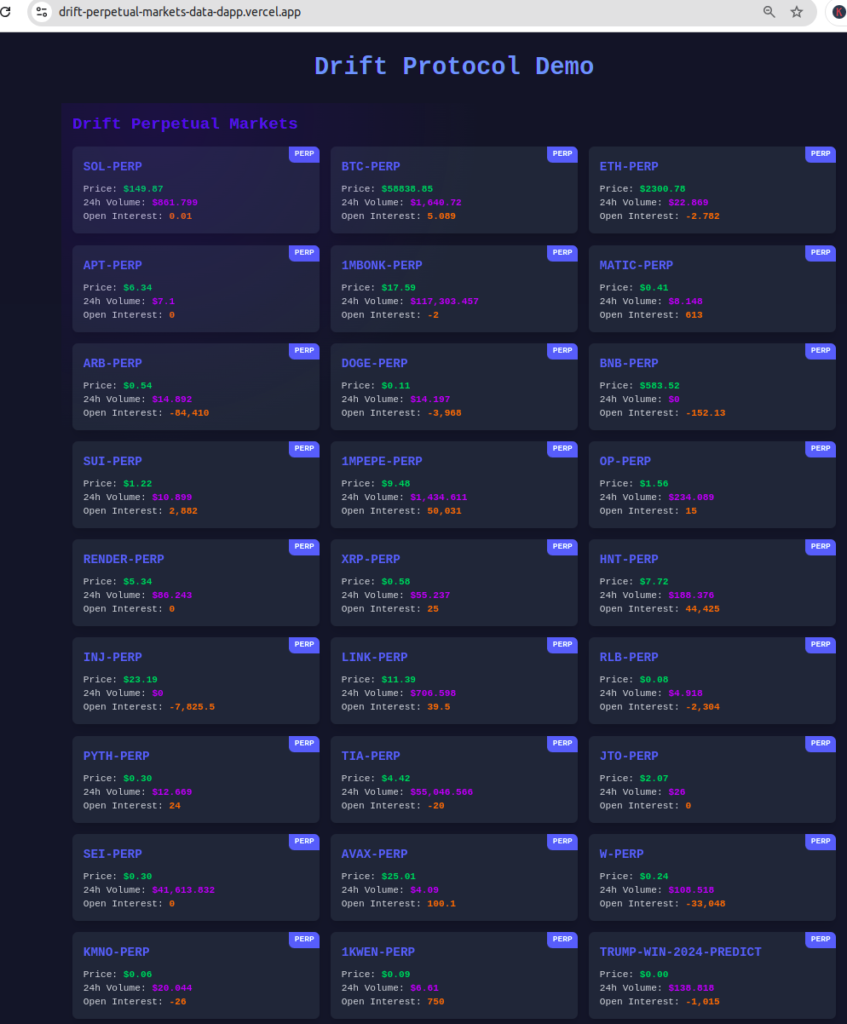
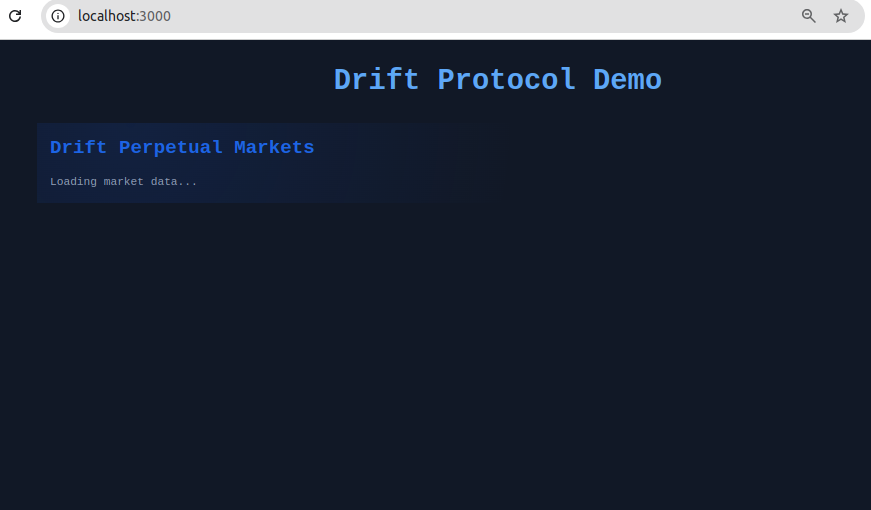
If you get previous codes correctly,
then you should now have a fully functioning Nextjs-powered dApp that is retrieving data from Drift Protocol API via the Drift SDK and displaying it in the Frontend like so:
Shows “Loading…” while awaiting a response from the Drift Protocol API Call
If it receives a response successfully from Drift Protocol API calls,
then you should have something like this:
If not successful, it will display error messages.
Kindly take time to fix the error including checking your browser console.
If unable to solve the errors, you can share a link to your repo and a screenshot of the error as a comment below (Avoid posting code directly in the comment to prevent being perceived as spam)
10.0 Deploy Your Drift Perpetual Markets Data dApp
Considering the above is localhost, to make it available to share with others, you need to host your Nexjs Drift protocol dApp on platforms like Vercel.
I used Vercel to host this free as you can access the one I used as an example previously below:
https://drift-perpetual-markets-data-dapp.vercel.app/
11.0 Drift Protocol GRANTS/ BOUNTIES/ HACKATHONS:
11.1 How To Get Drift Protocol Grants, Bounty and Support for Developers
Unlike Solana Blinks, there are fewer opportunities in terms of grants, hackathons and bounties to support your development integrating Drift Protocol but it still exists and some you may check out below:
Note: Most grants, hackathons or bounties listed below might have closed when you check them, so kindly check the Drift Protocol platform for new active ones.
Also, you can comment below to alert me of new and current ones to add up to the list below.
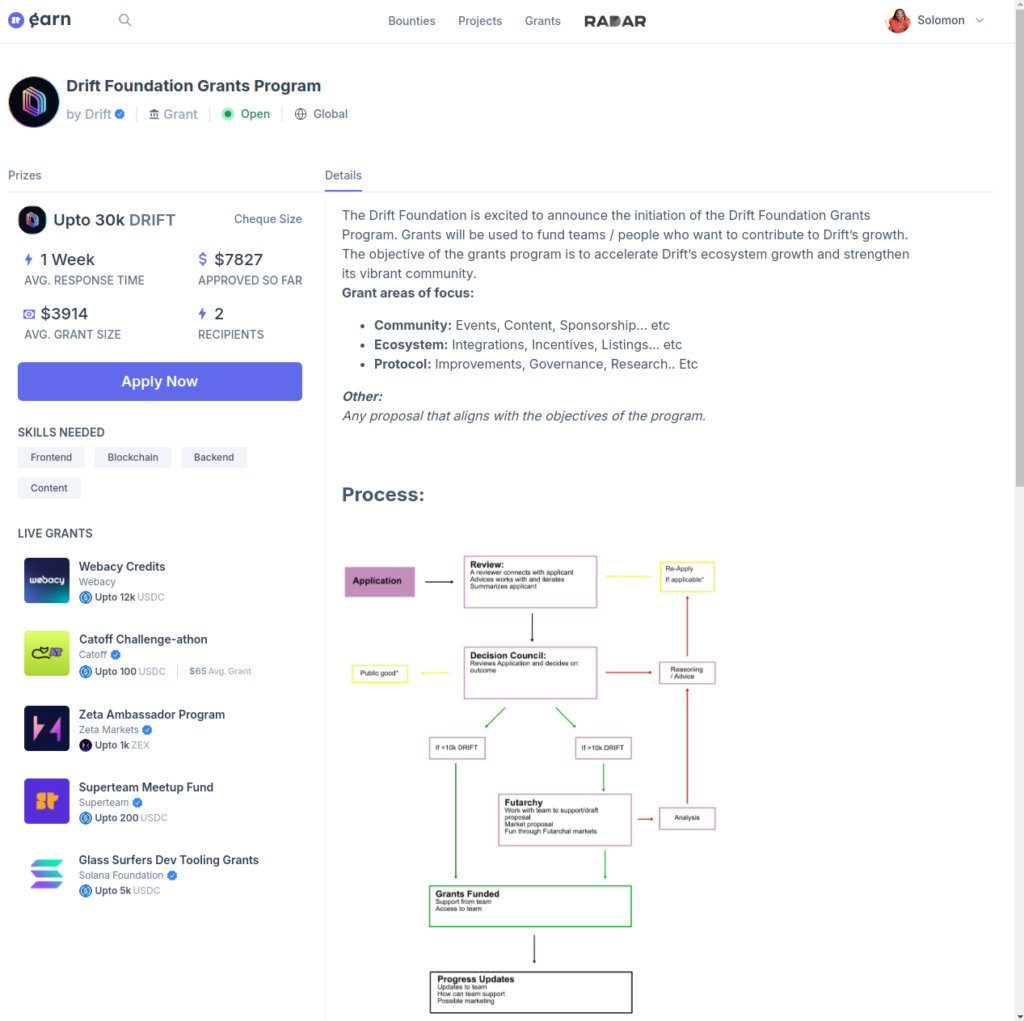
- Drift Foundation Grants Program 🎉 (I actually applied and got approved for this to support the creation of this content for developers – so, you can give it a try too)
12.0 Project Repository
The repo for the project done in this guide can be accessed below (Please remember to give it a STAR):
dPU Nextjs Drift Perpetual Markets Data dApp Codes Repo
13.0 EXERCISES
Do the following exercise to solidify your learning:
- Star and fork the above repo
- Clone to your PC
- Create a new branch
- Make changes (customize) to the way the retrieved data is been displayed as desired.
- Push your changes to the “Main” branch of your own repo from the new branch – Don’t send PR to the dPU repo you forked above, instead push to your own “Main” branch of your forked version of the dPU repo above.
- Host it on Vercel, Netlify or any other of choice
- Kindly follow the submission steps below for me to check.
13.1 Submission:
Things to submit for review:
- Share your experience making those changes alongside learning Drift Protocol development
- Share your hosted Drift dApp link on Vercel or other platforms.
- Share your forked repo link
Then, submit all the above details for a check as a comment under this post (do not post it in dPU discord or send me a DM, will not attend to such please).
Remember, after posting as a comment under this post, you can then send me a reminder in the dProgramming University discord server under the “Support” section above in the #Solana channel for me to check your submission ASAP.
14.0 Conclusion
It was an interesting ride and glad you made it to this point.
Congrats👏 once again and it’s time to take positive advantage of the opportunities opened up to developers with the introduction of Drift Protocol SDK/API and grants to encourage and support devs.
WHAT NEXT?
I aim to create intermediate and advanced Drift Protocol development content and share them in future guides with you.
Thus, kindly use the social media share button to share this guide if you have found it helpful or will be helpful to some developers in your social media sphere. And join the discord to stay in the loop.
Thanks for your time, it’s been a wonderful ride with you all this while.
SOLOMON FOSKAAY
Founder, dProgramming University (dPU).
Twitter: SolomonFoskaay
DSCVR: SolomonFoskaay