How To Create Ethereum Token In 5 Minutes With Moralis [+Example Codes]
Full step by step guide on How To Create Ethereum Token In 5 Minutes With Moralis with the source code available for you to copy and reuse for free to master the process of creating tokens even on the Binance Smart Chain (BSC) Blockchain.
How To Create Ethereum Token In 5 Minutes With Moralis Answered Step by Step Guide
SECTION A: Text-Based Answer
STEP 1: First you need to understand what is Ethereum ERC-20 token (Watch the full video in section B below to understand how the Ethereum ERC-20 token works)
HEAD-UP: Some of the screenshots below may reflect BSC and not ETH directly – Why? It same process (only difference is the Blockchain we eventually deploy the contract on) and came from my previous BSC token creation steps. Focus on the steps not the names on the screenshots.
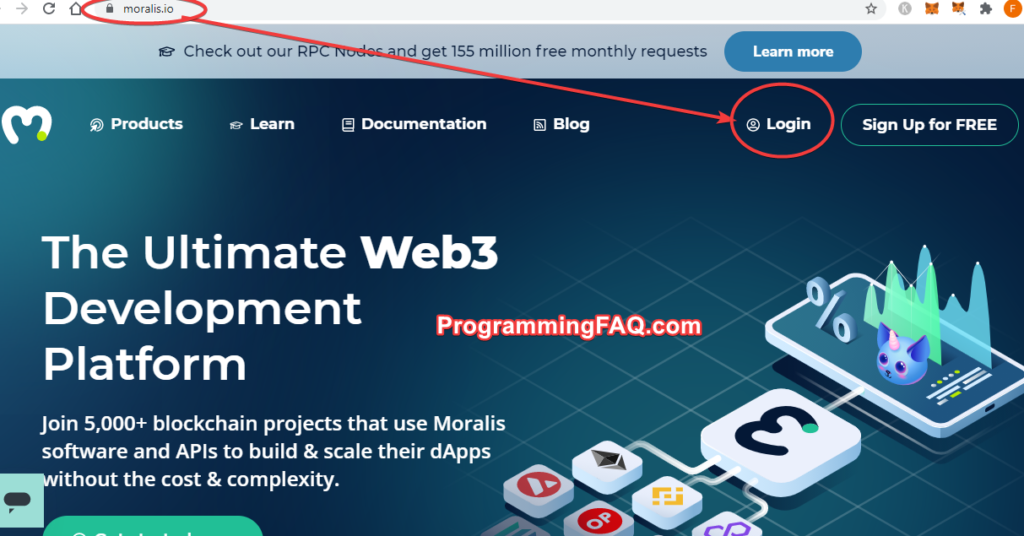
STEP 2: Create Moralis Account (Still free as at the time this was published)
STEP 3: Setup Ethereum Ropsten Testnet using Moralis Speedy Nodes

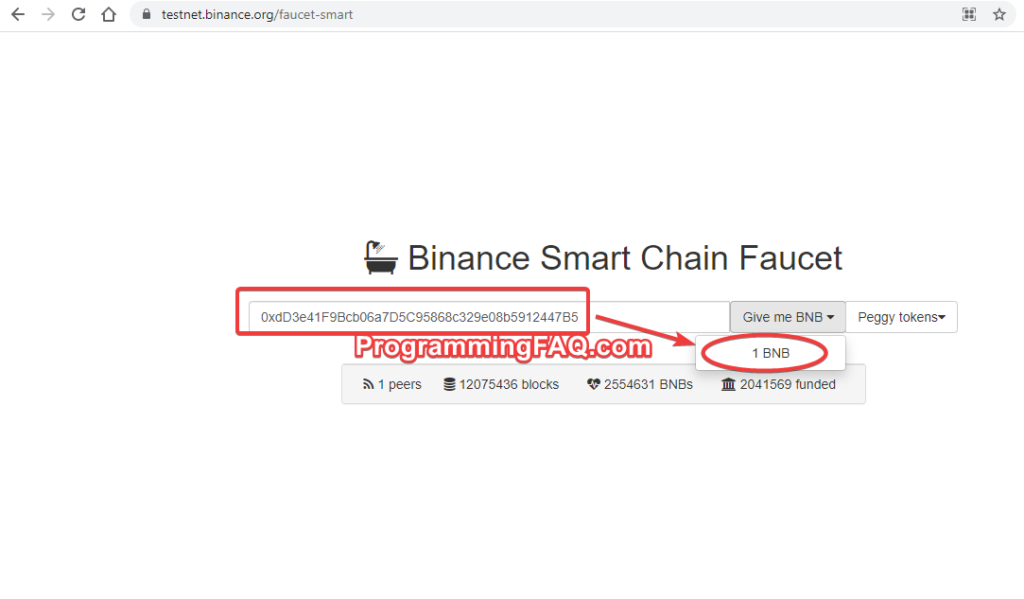
STEP 4: Get Free ETHER from the Ropsten Faucet (Ethereum Testnet Faucet) to deploy your crypto token on BSC for free (watch video below for more details)
STEP 5: Setup Additional Metamask Web3 Legacy Chrome Extension (optional – and its not official Metamask and you should never put in your private key or secret keys or seed phrase)

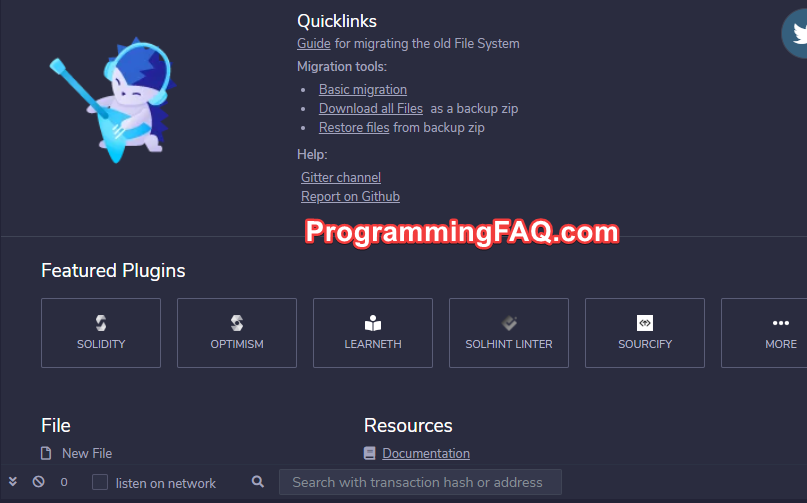
STEP 6: Time to use a free online Solidity IDE – Go to Remix
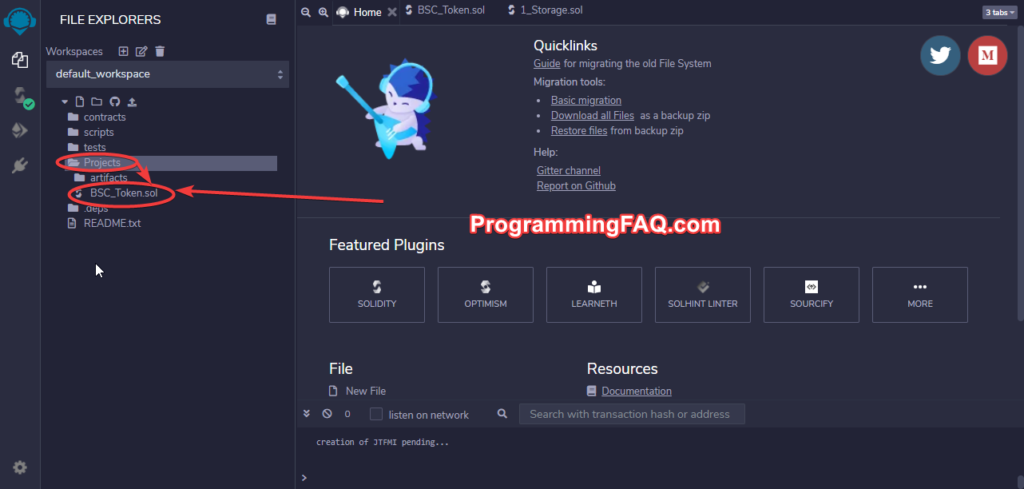
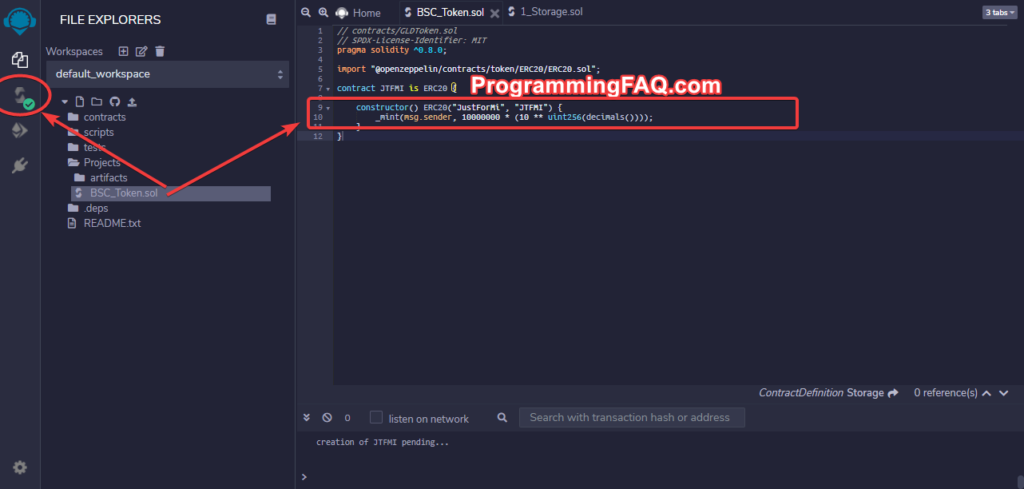
STEP 7: Create a folder and file to put your crypto token smart contract code in
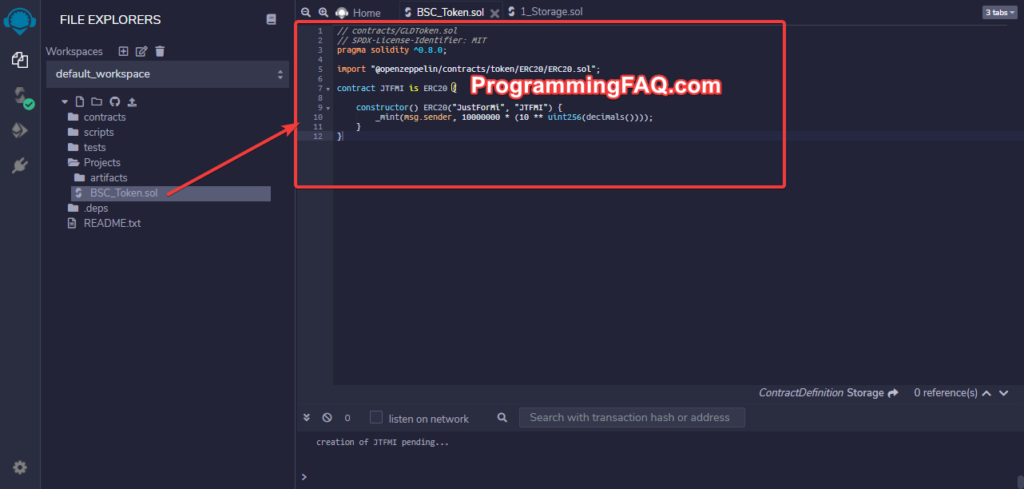
STEP 8: Copy the ERC20 token Smart contract source code from section C below and paste inside the Remix IDE (Watch video below for help) file you created in step above
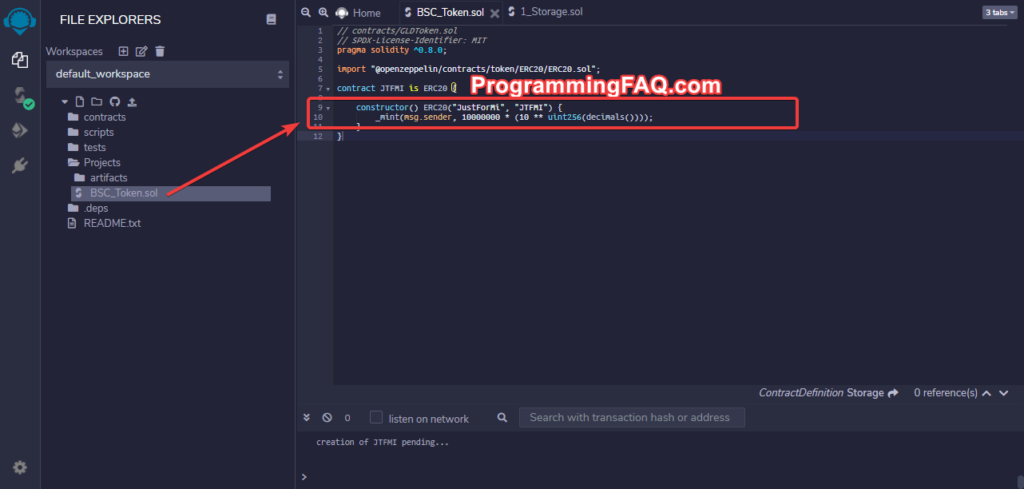
STEP 9: Replace the token name, token ticker and amount of token to mint on the Ethereum Blockchain.
STEP 10: Ensure Everything is well compiled by the IDE and no error
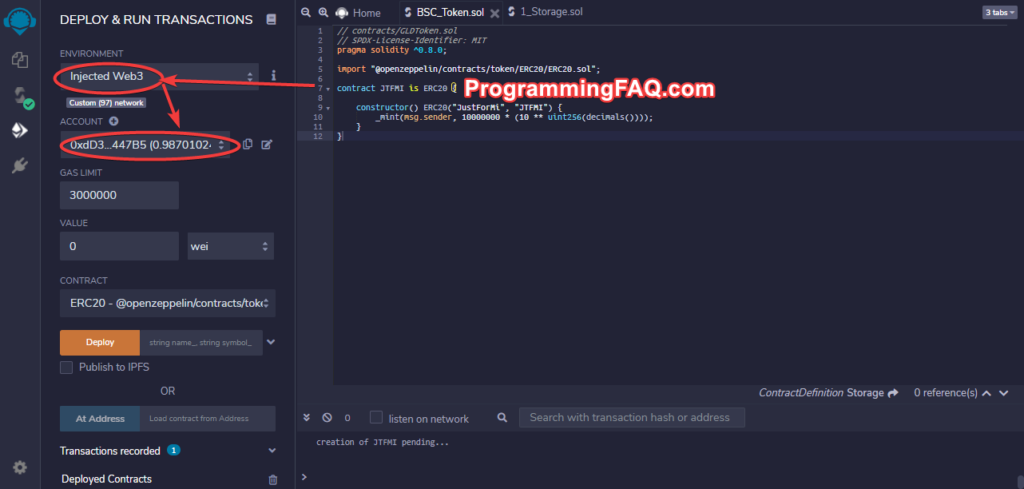
STEP 11: Time to deploy using the option “Inject Web3” in Remix and connect your Metamask wallet with the free testnet ETHER in it to pay for transactions
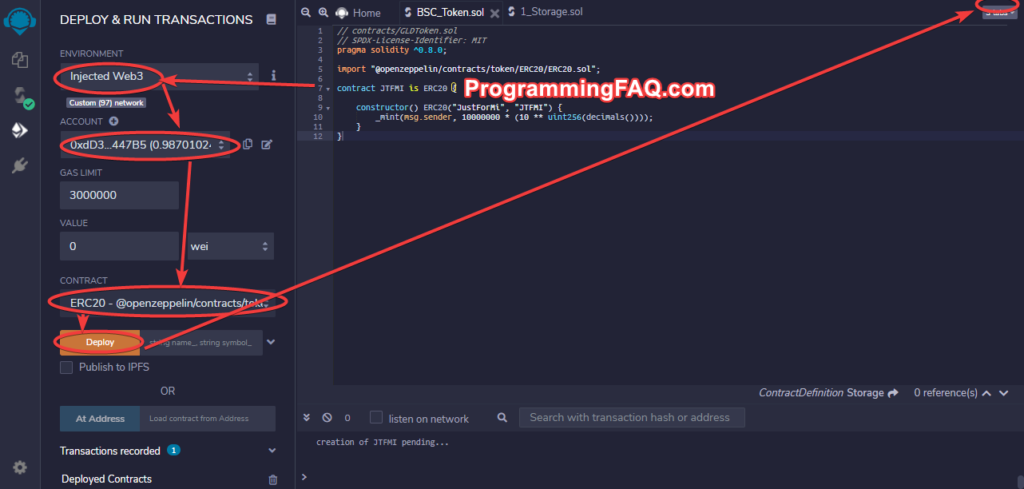
STEP 12: Select the Smart contract name and Click “Deploy”

STEP 13: Approve the transaction in your Metamask
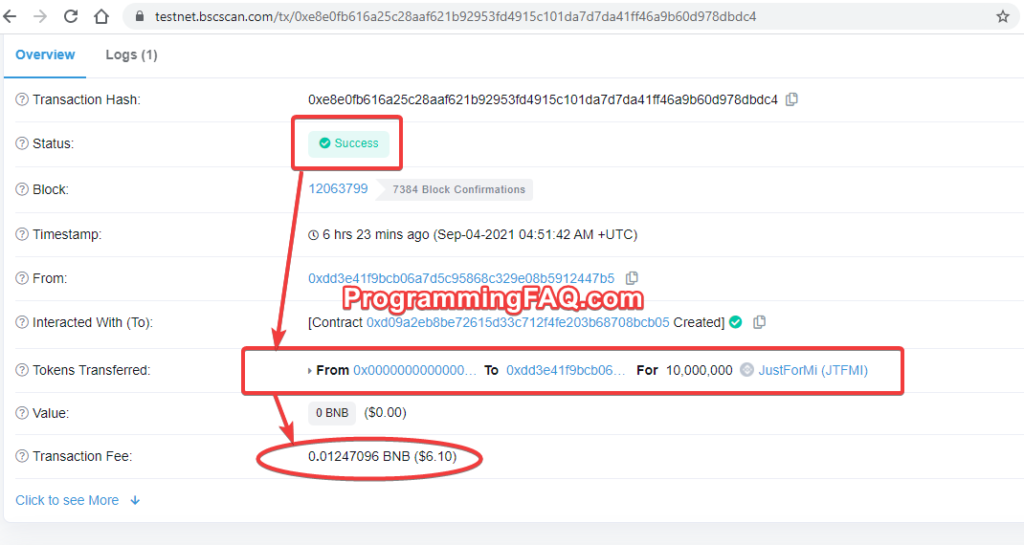
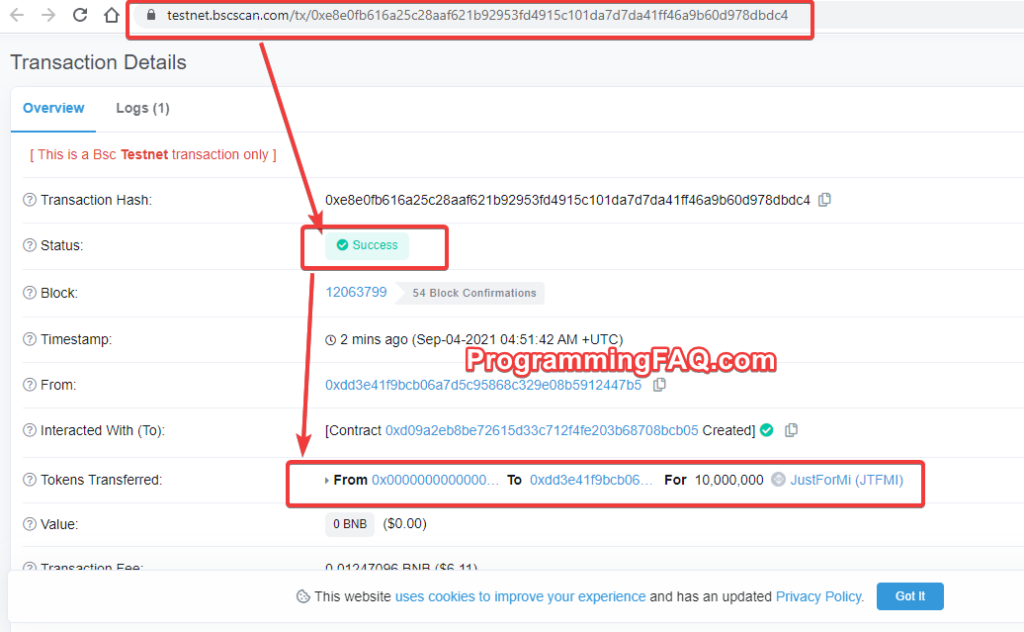
STEP 14: Once completed, click the transaction and view it on EtherScan Testnet

STEP 15: Congratulations, you have successfully create a token on Ethereum Blockchain
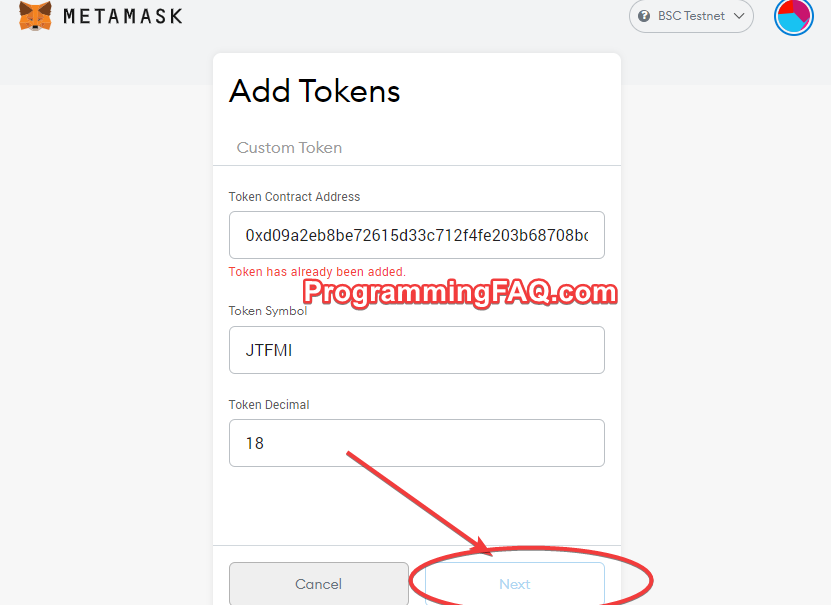
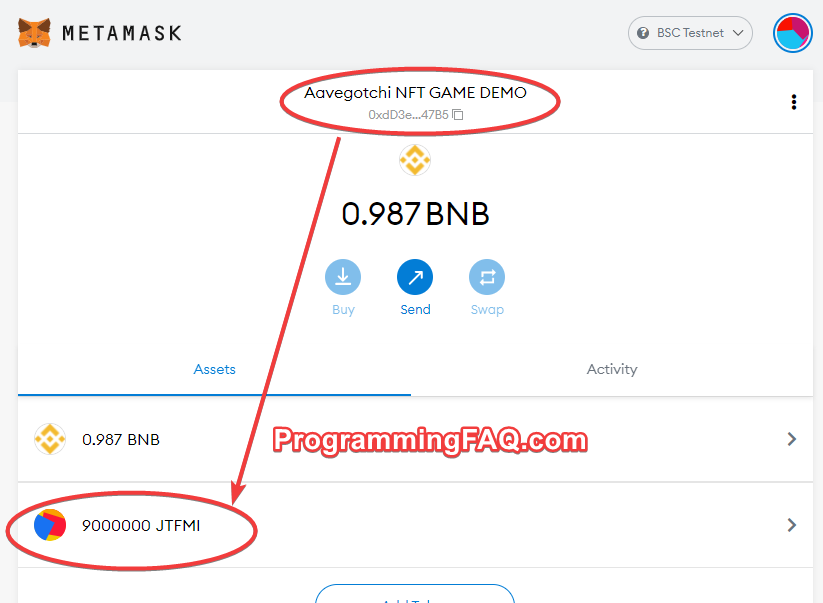
STEP 16: Time to add it to show in your Metamask which shows the beauty of Moralis Speedy Nodes used earlier. Just add the new token smart contract address and Moralis and Metamask will auto detect the token name, ticker and digits.

STEP 17: Click Add token to complete it
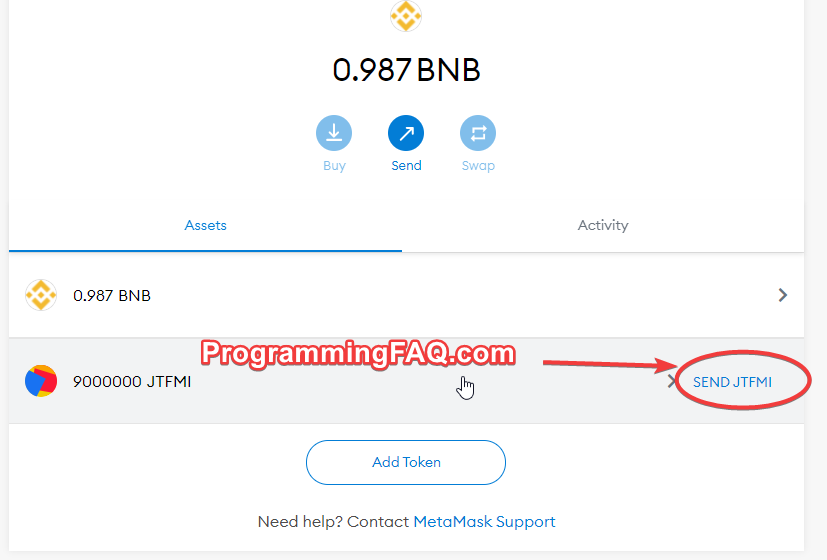
STEP 18: Its time for How To Transfer Crypto Token After Creating It. Click Transfer/Send JTFMI2 (thats the name of the same token I created for you in this guide – watch video)
NOTE:
JTMFI 1: was created and deployed as BEP-20 Token on BSC Blockchain
JTFMI 2: while this guide you reading now shows JTFMI2 created and deployed as ERC-20 Token on Ethereum Blockchain.
JTMF1 3: will likely be created and deployed as Matic Token to Polygon/Matic Blockchain (so, subscribe to our YouTube channel and mark notification bell to get instant alert was the video posted soon)
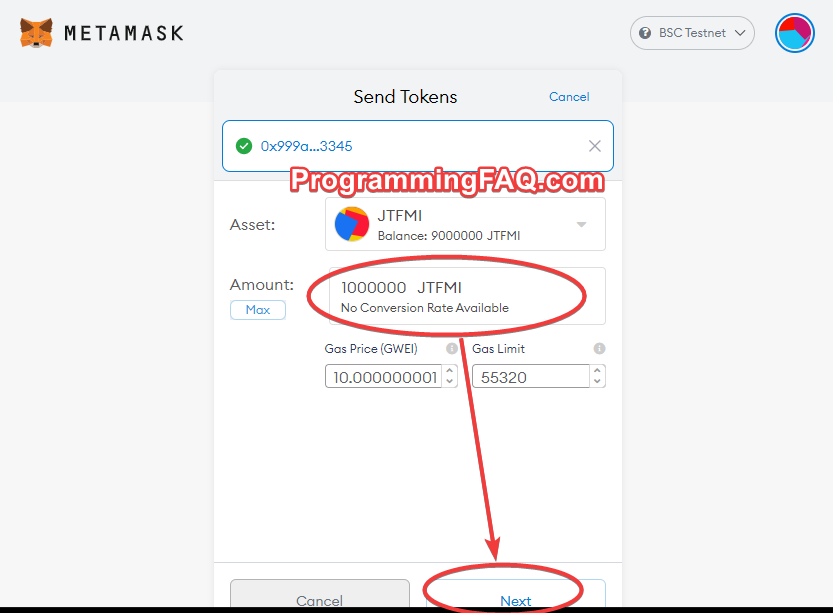
STEP 19: Put another ETH Wallet address and try send atleast 10% of the total supply of token created (in this sample I created 10Million JTFMI2 tokens and sent 2.5Million JTFMI – yours can be different based on your total supply minted token on BSC).

STEP 20: Approve the ETH transaction fee paid from the free ETH faucet you got earlier
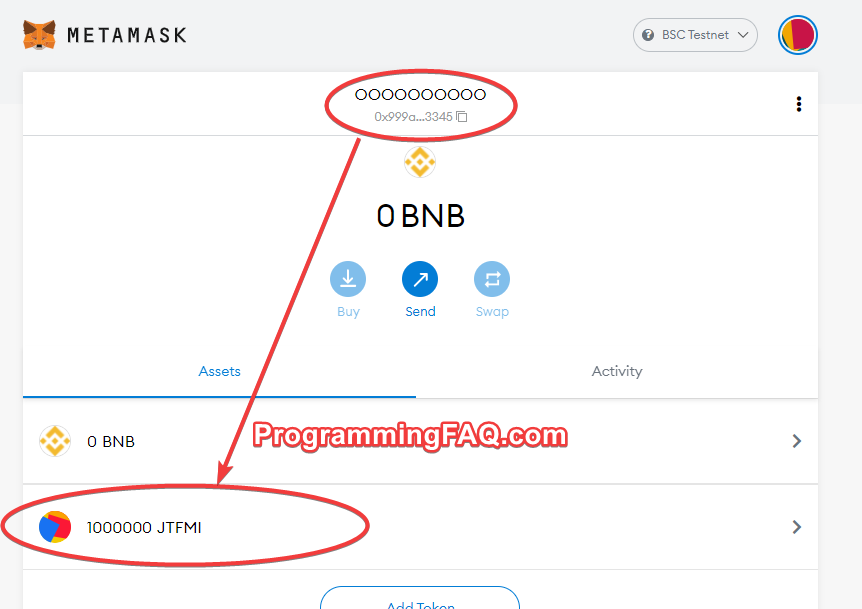
STEP 21: Check the transaction on EtherScan and once successful – Hurrah – we have not just create a crypto token but now also able to transfer between different wallets on Ethereum Blockchain!!!

STEP 22: Check both wallet and you will discover that the main wallet now has 7.5Million JTFMI2 tokens left after the transfer and the second wallet we sent to now has 2.5Million JTFMI2 which could be send also to any other wallet or trade on exchange (watchout for my guide on listing this created crypto token on an exchange).
STEP 23: Congrats you now created your first Crypto token (Ethereum ERC 20 Token) on Ethereum Blockchain in just 5 minutes with the help of OpenZepplin ERC20 token smart contract and Moralis Speedy Nodes.
STEP 24: Practice and practice first for free using BSC Testnet before you deploy to ETH Mainnet which will cost you just about 0.01ETH (valued at $50 at the time of publishing this article, it may have increase significantly after that)
SECTION B: Video-Based Answer
Watch me answering your question “How To Create Ethereum Token In 5 Minutes With Moralis” in a video step by step:
SECTION C: Source Code For Above Answer
Copy and use the example of How To Create Ethereum Token In 5 Minutes With Moralis below for free:
ERC-20 TOKEN SMART CONTRACT SOURCE CODE:
Source code Hidden Because You Are Not A Member – Don’t Worry, Membership is Free and the source code will be available FREE once you login.
REGISTER FREE or LOGIN HERE