Solana Blinks Development Ep2: Ultimate Guide To Build Blinks Games (Rock Paper Scissors (RPS) Game Blinks)
1.0 Introduction
1.1 Overview Of Guide/Tutorial’s Goal
Helping Developers Understand Building Games with Solana Blinks To Build Their First Blinks-powered Game using Solana Actions and Nextjs
In this Episode 2 of the ultimate guide for Blinks development, I will guide you through building your first Solana Actions and Blinks -powered Game.
Yeah at the end of this guide, you will go from zero knowledge of Blinks Game Development to developing a production-ready Blinks game.
1.2 What You Will Build In This Guide
Here is what you will build at the end of this guide (A Rock Paper Scissors (RPS) Game Blinks dApp):
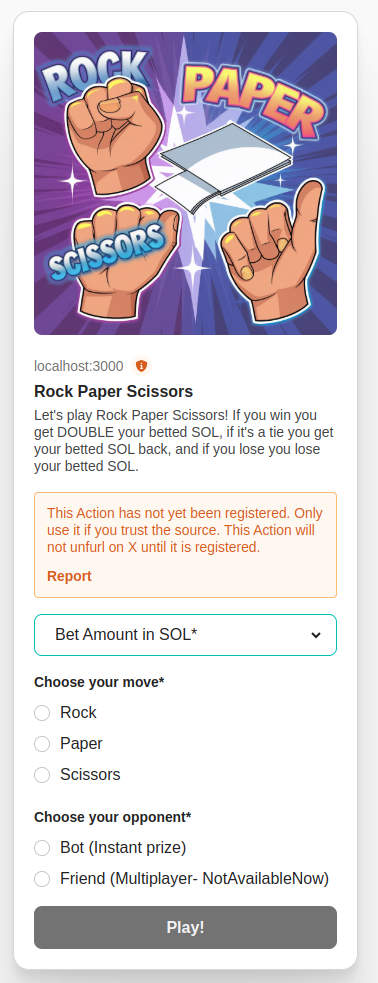
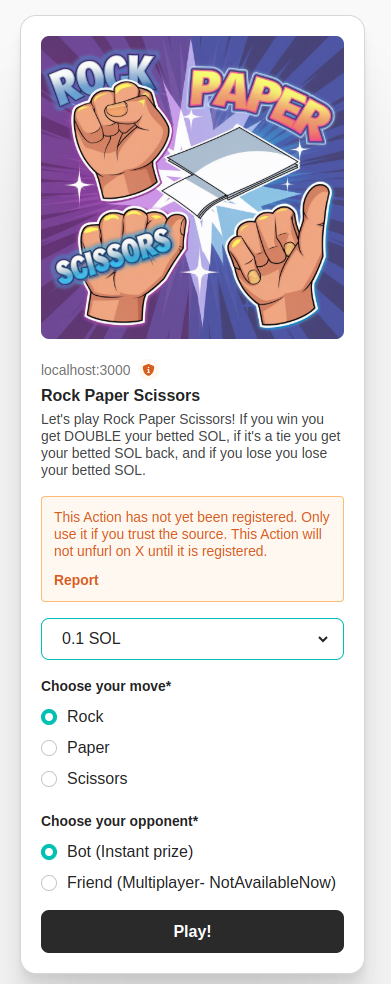
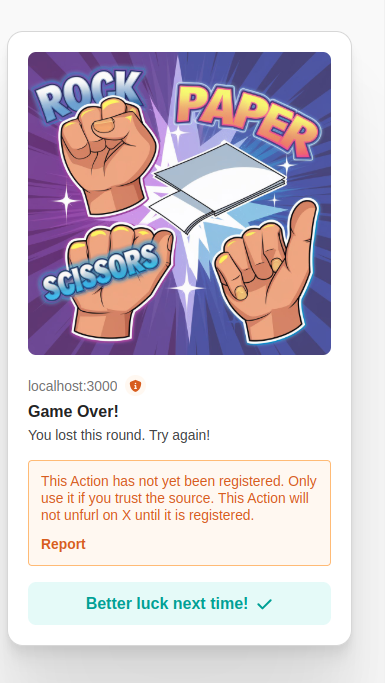
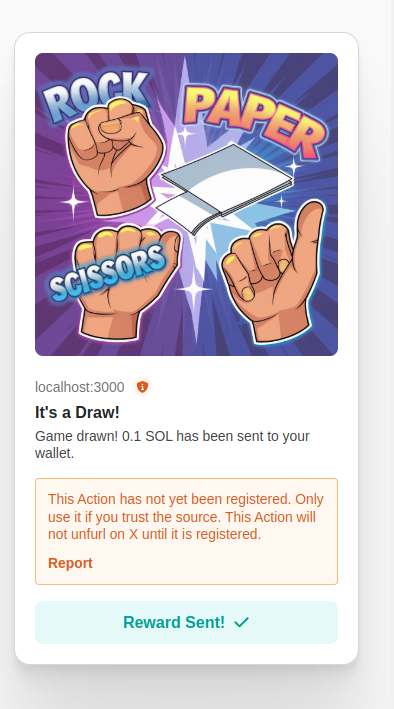
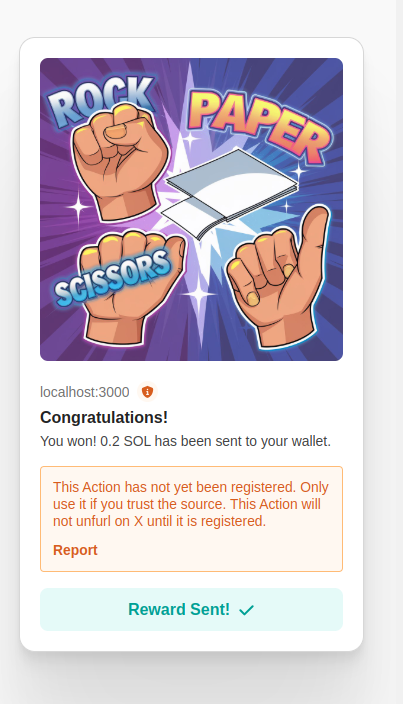
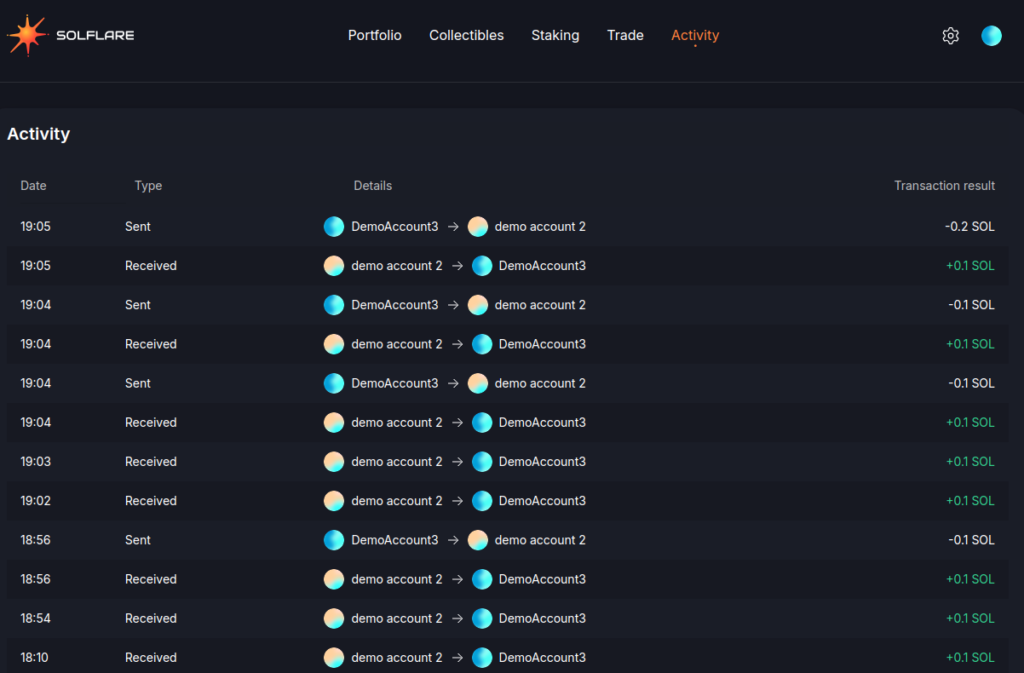
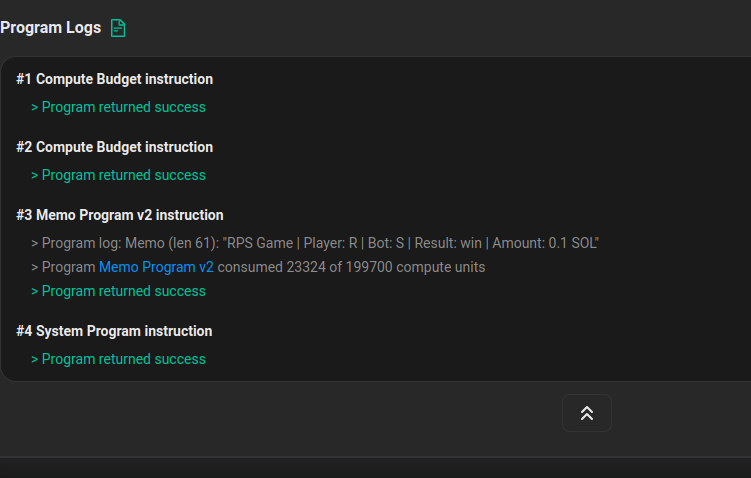
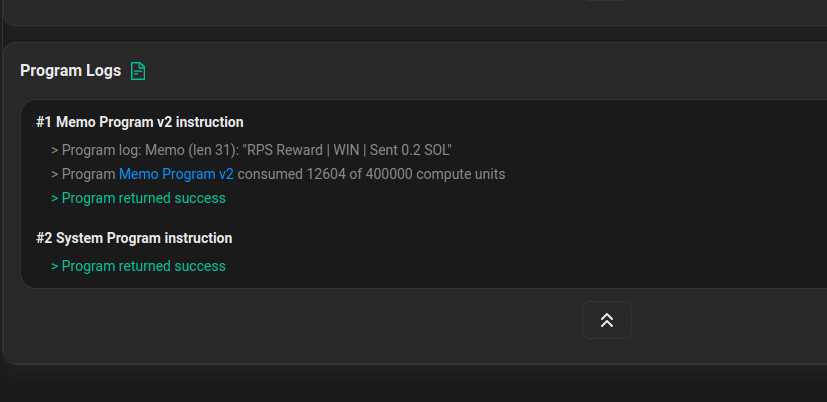
Don’t worry if you have never heard of Solana Blinks or some of those aforementioned tech stacks before (nothing to fear 😀). I will cover them step by step with you all the way.
So, what are you waiting for?
Grab your Blinks Dev hat and let Dev away (lol 🤨).
Meanwhile, even if you have never developed a Nextjs App before and are just starting entirely, you are also covered too, because I ensured this is actually step-by-step with helpful resource recommendations for beginners and at the end,
you will have access to the full code repo to play around with and even have assignment to submit to horn your Blinks game development skills further.
1.2.1 INSPIRATION FOR THIS PROJECT:
I was inspired to build this Rock Paper Scissors (RPS) blinks game based on the SendArcade RPS blinks game.

Though their RPS blinks game code wasn't open-sourced, so it took me alot more time to study the game play and build it from scratch myself to achieve the above (+ Cursor AI IDE helpful features).

Meanwhile, I will be releasing the full game source code (as open-source) at the end of this guide for anyone to build with.
1.3 What You Will Learn From This Guide
Here is what you will learn at the end of this guide:
1. Solana Actions and Blinks

2. Blinks Actions Chaining (Post Method with Nextjs)

3. Building Solana Game Blinks

4. Building Solana Transaction to Reward Game user Onchain instantly based on game play outcomes.

5. Building Blinks Game with Nextjs

6. Record Game Player moves and results Onchain (using Solana Memo program)
1.3 Stuck? Get Support✋
I understand based on experience with developers that things can always break or get difficult to figure out, especially for beginners.
That is why you can get support for this content in just 2 steps:
STEP 1: Comment your questions below this guide to get support if get stuck (please avoid questions out of the context discussed here or they won’t be responded to)
STEP 2: Then join Discord below to alert me to check your questions (doing this ensures I can be aware of your comment to check and respond ASAP).
PLEASE avoid posting questions in Discord directly because I may not respond there. Asking here under the post directly as a comment and getting a response helps to ensure other developers going through the same issues can access the solution without repeatedly asking the same questions on Discord.
Join dProgrammingUniversity Discord Server – I have created a dedicated channel #Solana (under the BLOCKCHAINS category).
So, feel free to ask questions below in the comment section if you are stuck with this guide.
You can Follow me on X(Twitter)
DISCLOSURE:
We may hold, invest, trade or receive rewards/grants/bounty/tokens from reviewed/discussed web3 projects/affiliates (before, during or after this content was published).
DISCLAIMER:
All our contents at dProgramming University are for educational purposes only and do not constitute financial, trading, investment or development advice.
Please do your own research (DYOR).
By using or following the whole or part of this content, you agree that we are not liable for any losses that you may suffer thereafter.
2.0 Understanding Rock Paper Scissors (RPS) Game Mechanics
Yeah, I know that you are here to start deving😜 away but it is important to know what the Rock Paper Scissors (RPS) game we are building is all about first before building it.
When we understand the game mechanics, then we can easily outline how to represent each within the digital blinks version.
2.1 RPS Game Rules and Flow Explained
Let’s see what the Rock Paper Scissors (RPS) Game means:
Rock Paper Scissors (RPS) is a hand game where two players simultaneously choose one of three hand gestures: “rock” (a closed fist), “paper” (a flat hand), and “scissors” (a V-shape with the index and middle fingers), with the rule that rock beats scissors, scissors beat paper, and paper beats rock; if both players choose the same gesture, it’s a tie and the round is usually replayed.
– Wikipedia
It means we will need to create a Bot to play against the user in other to determine the winner or draw.
2.2 RPS Game Reward System Design Explained
Let’s see how the Rock Paper Scissors (RPS) Game rewards work to guide us in building it out for the Blinks game:
Key mechanics:
Simultaneous choice: Both players reveal their hand gesture at the same time.
Winning combinations:
i. Rock beats Scissors
ii. Scissors beats Paper
iii. Paper beats Rock
iv. Tie: If both players choose the same gesture, the round is a tie.– Wikipedia
2.3 RPS Game Design Technical Requirements And Architecture Options Explained
Yeah, let us represent the above as follows:
1. The player plays Rock Paper Scissors (RPS) game via Blinks with SOL.

2. If Loss (lose SOL amount played with e.g 0.10SOL=0.00SOL)

3. If Draw (gets back exact SOL amount played with e.g 0.10SOL=0.10SOL)

4. If Win (gets back double the SOL amount played with e.g 0.10SOL=0.20SOL)

5. Win/Draw SOL rewards are sent to the player instantly using action chaining (Post method in Nextjs)

6. All Player moves and results (wins/draws/losses) are recorded on-chain

Using Memo for onchain record to ensure if anything goes wrong with player getting rewarded after wining, we can step in to send their rewards manually relying on the onchain record at the time that the game was played.

Onchain record is trustworthy as neither the Player nor the Developer of the game can change it once added onchain which builds more trust and transparency in resolving rewards conflicts.)
Now that we have a clear picture of how the digital RPS mechanics will work, there is a need to consider how each will be implemented technically even before we start coding.
2.3.1 BOT:
Because we need at least 2 players playing against each other at a time.
We can build a Bot (auto-generated moves) that will play against the human player.
2.3.2 FRIENDS:
What about making it player vs player instead of Bot (essentially turning it into a multiplayer blinks game)?
Yeah, interesting but that is more complex and won’t be covered in this guide.
2.3.3 REWARD SYSTEM:
After a player draws or wins, we need to consider how the game rewards them.
Manually? That isn’t fun😜
Automatically and instantly? That’s fun 😍 and the best but not easy to implement.
So, let go for the instant automated reward system design option.
And to achieve this with Solana Blockchain architecture, we have 2 major options to consider:
- Wallet Account: Free and easy to set up, manual reward transfer back to winner (no worries have got a way to automate signing the reward transfer transaction automatically – hurray😂)
- Solana Program: Costly to deploy, complex to build but faster automation for reward payout.
It is a no-brainer, to choose the “wallet Account” option for this guide
but feel free to explore the alternative Solana program options too on your own.
Now that we understand the Rock Paper Scissors (RPS) Game Mechanics and how to implement it technically,
its time to actually get to work building.
3.0 Essential Tools and Resources for Rock Paper Scissors (RPS) Game Blinks Development
So, let us have a quick dive into essential tools and resources you need to build and develop Solana actions game API that then successfully unfurls and turns into a Blinks game.
3.1 Solana Blinks Documentations
Considering Solana Actions and Blinks is like a join-venture between Dialect Labs and Solana Foundation, there exist multiple pieces of documentation you can consult:
3.2 Blinks-enabled Solana Wallets
The following Solana wallets are compatible with Blinks:
3.3 Solana Blinks Chrome Extension by Dialect
One of the easiest ways to access blinks on blinks-enabled platforms like X (Twitter) and others is using the Blink Chrome extension by Dialect.
Click to Download Solana Blinks Extension By Dialect
3.4 Solana Blinks Testing and Inspection Tools
When developing Solana Actions, you can use Blinks inspector tools to check if it will successfully unfurl to Blinks on Blinks-enabled platforms.
3.5 Solana Blinks Explorer
Blinks explorer platforms allow you to access Solana Blinks easily. You can also submit your blinks to be featured as am currently working on it:
Check Solana Blinks Explorer
3.6 Solana Actions And Blinks Specifications
The Solana Actions specification are essentials that must be part of a request/response interaction flow to be successful:
1. Solana Action URL scheme providing an Action URL
2. OPTIONS response to an Action URL to pass CORS requirements
3. GET request to an Action URL
4. GET a response from the server
5. POST request to an Action URL
6. POST response from the server
3.7 Solana Actions and Blinks Common Issues And Fixes
When developing Solana Actions for Blinks, there are some commonly known issues that might arise, below are some of them with suggested fixes:
ERROR 1: CORS HEADER Error
SOLUTION: Must use CORS HEADER or it won’t render or execute actions (for both GET and POST requests – thanks to the Solana Actions Package has a valid CORS HEADER pre-configured- just import and use it in the GET/POST endpoints). You will see this practically under the Blinks development section below.
ERROR 2: OPTIONS Error
SOLUTION: Solana Actions uses OPTIONS response to do a preflight test before the actual request (just to simulate if the actual request will fail or pass like does it has a valid CORS HEADER etc.) –
Learn more at https://solana.com/docs/advanced/actions#options-response
3.8 Limitations of Solana Blinks
Blinks are awesome and help make Solana actions interactive for users anywhere they are online as long as the platform is blinks-enabled but it still has a lot of issues and requires more improvement.
So, when developing actions for blinks, keep them in mind (though they will all likely be solved in future even before you read this):
- Single-session and non-persistent: means if user reload a page where they are currently in the middle of an interaction or transaction with a blink, the initiated session will be lost and refreshed entirely new.
- Limited supported platforms: Solana Blinks support was launched with X(Twitter), Third-party websites but it is now gradually extending to more platforms.
- Testing Solana Actions and Blinks Locally: Localhost actions URLs unfurl to blinks, but might not get properly validated. If you want validation, the Dialect team suggested using a tool like Ngrok (https://ngrok.com/) which creates a tunnel to your local server, gives you a temporary URL that can simulate actual deployment to test your Solana actions Blinks unfurling done properly
4.0 Pre-Requisites For Rock Paper Scissors (RPS) Game Blinks Development
Before diving deep into developing your first Blinks-powered game dApp with Nextjs,
let’s quickly set up the required developer environment.
4.1 Nextjs-Powered Rock Paper Scissors (RPS) Game Blinks Requirement
Meanwhile, having knowledge of the following will be helpful:
(1) Nextjs Development:
As I mentioned earlier if you have never developed with Nextjs javascript framework before, then I have a Full-stack Web3 Frontend Development FREE Course you can take to help get started with it for free.
(2) Solana Blinks Development Ep1:
If you have not explored blinks development at all before, I believe that the best place to start is Solana Blinks Development Ep1: Ultimate Guide To Solana Blinks Development For Developers and familiarize yourself with the features. Also, it will guide you step by step to build your first blinks as a beginner before you move on here to more advanced like this guide blinks game development.
(3) SOL Balance:
You need to have some SOL in the wallet you want to use (on Devnet which is free – claim some Devnet SOL here). But if Mainnet, then you need to acquire real SOL for cash on exchanges.
4.2 Setting Up Development Environment for Rock Paper Scissors (RPS) Game
Installing necessary tools and software
You will need to have the following installed on your computer.
NOTE: For this guide, I am using Linux OS (Ubuntu):
- Nodejs
- Node Package Manager – I prefer using PNPM over NPM and Yarn (use your preferred choice)
- IDE – VSCode, Cursor etc. (I use VSCode but gradually moving towards using Cursor more now instead of VSCode for easier AI development features accessibility)
- Solana Actions Node Package – Pre-loaded with lots of features needed to reduce writing much code for Solana actions API route endpoints.
- Solana Web3.js – (Though most things are already available via the Solana Actions Node Package, this is still needed for things like creating connections to Solana clusters like Mainnet, Devnet etc.)
5.0 VIDEO: Creating Your First Blinks Games (Rock Paper Scissors (RPS) Game Blinks)
I have a step-by-step- video for this guide.
Watch me go through the Build Your First Creating Your First Blinks Games (Rock Paper Scissors (RPS) Game Blinks) dApp With Nextjs in the video below:
6.0 Creating Your First Blinks Games (Rock Paper Scissors (RPS) Game Blinks)
As promised earlier, I will not conclude this guide without you building your first Nextjs-powered game blinks.
Here we are, lets get started building Rock Paper Scissors (RPS) Game Blinks dApp.
Shall we?🤔
6.1 Install Nextjs For Rock Paper Scissors (RPS) Game Blinks Development
Create a folder named
blinks-game-1-rock-paper-scissors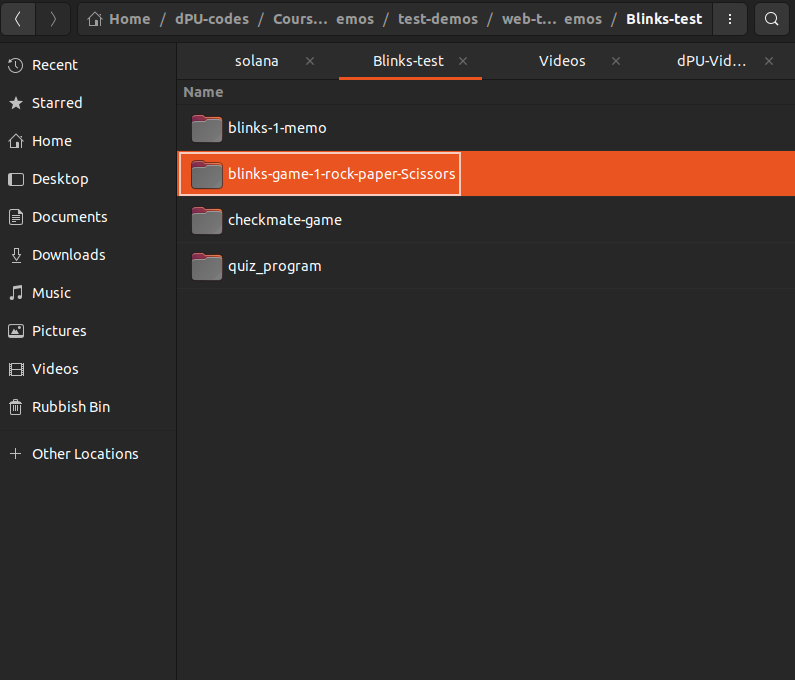
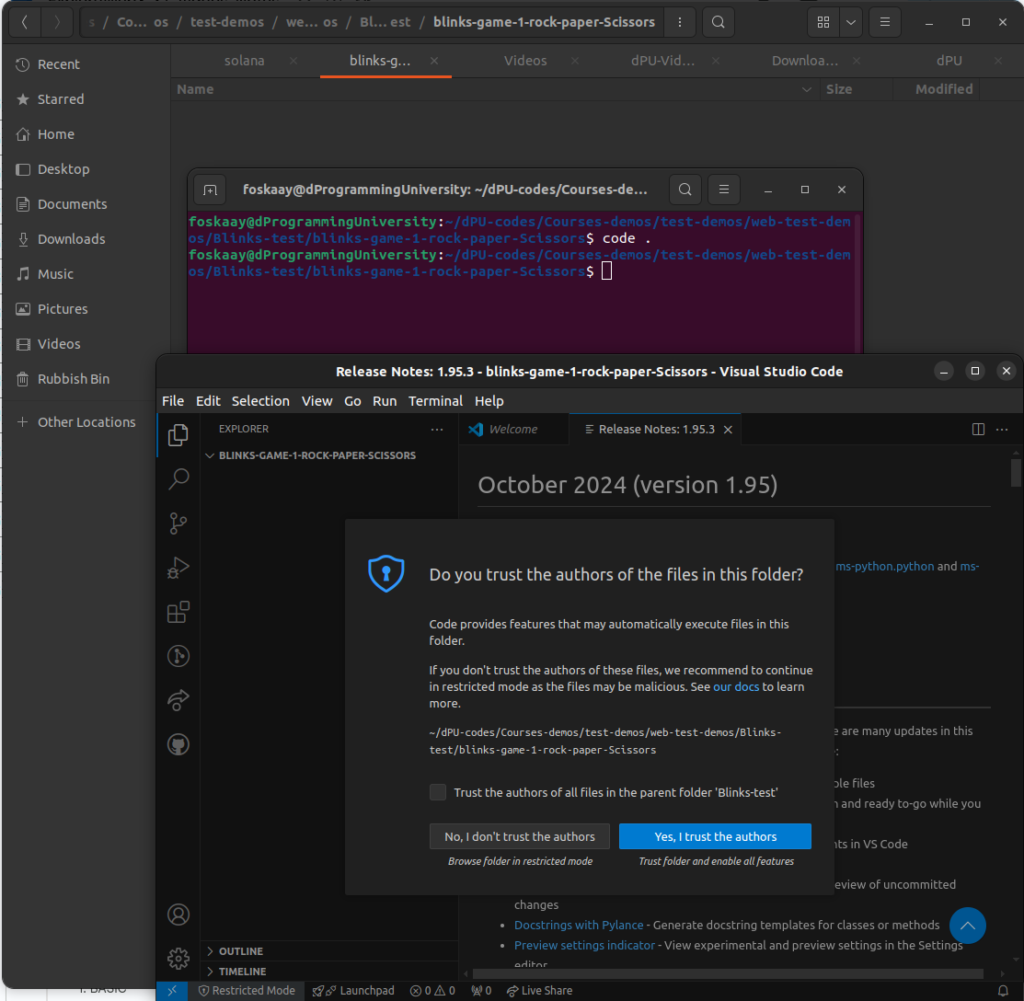
Open it and inside the “blinks-game-1-rock-paper-scissors” folder, right-click to open in “Terminal”
In the terminal, type command
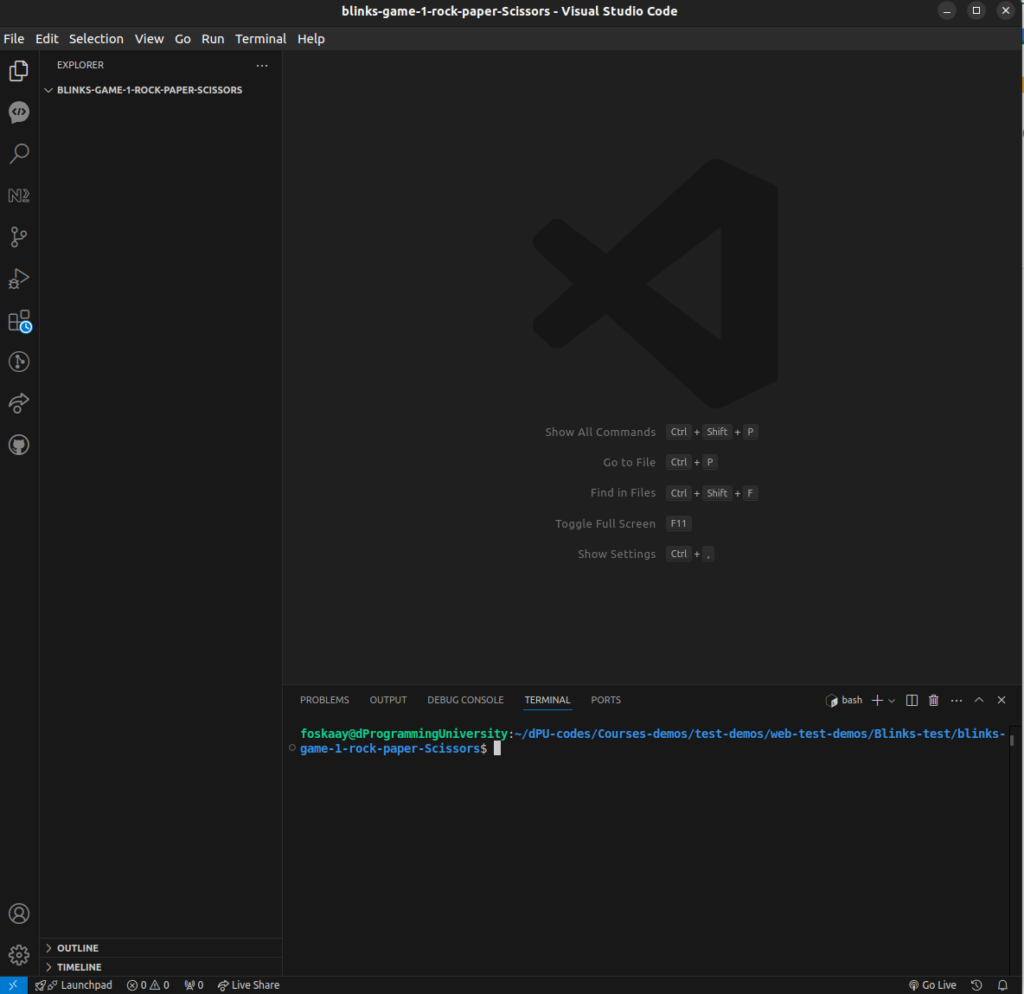
code .This will open the “blinks-game-1-rock-paper-scissors” project folder in VSCode as seen in the screenshot below:
In VSCode, open a new “Terminal” (Let’s call it “Terminal 1”) and install Nextjs following the instructions below:
Install Nextjs using the default setup with the command:
pnpx create-next-app .Select details as:
✔ Would you like to use TypeScript? - Yes
✔ Would you like to use ESLint? - Yes
✔ Would you like to use Tailwind CSS? - Yes
✔ Would you like to use `src/` directory? - No
✔ Would you like to use App Router? (recommended) - Yes
✔ Would you like to use Turbopack for next dev? - No
✔ Would you like to customize the default import alias (@/*)? - No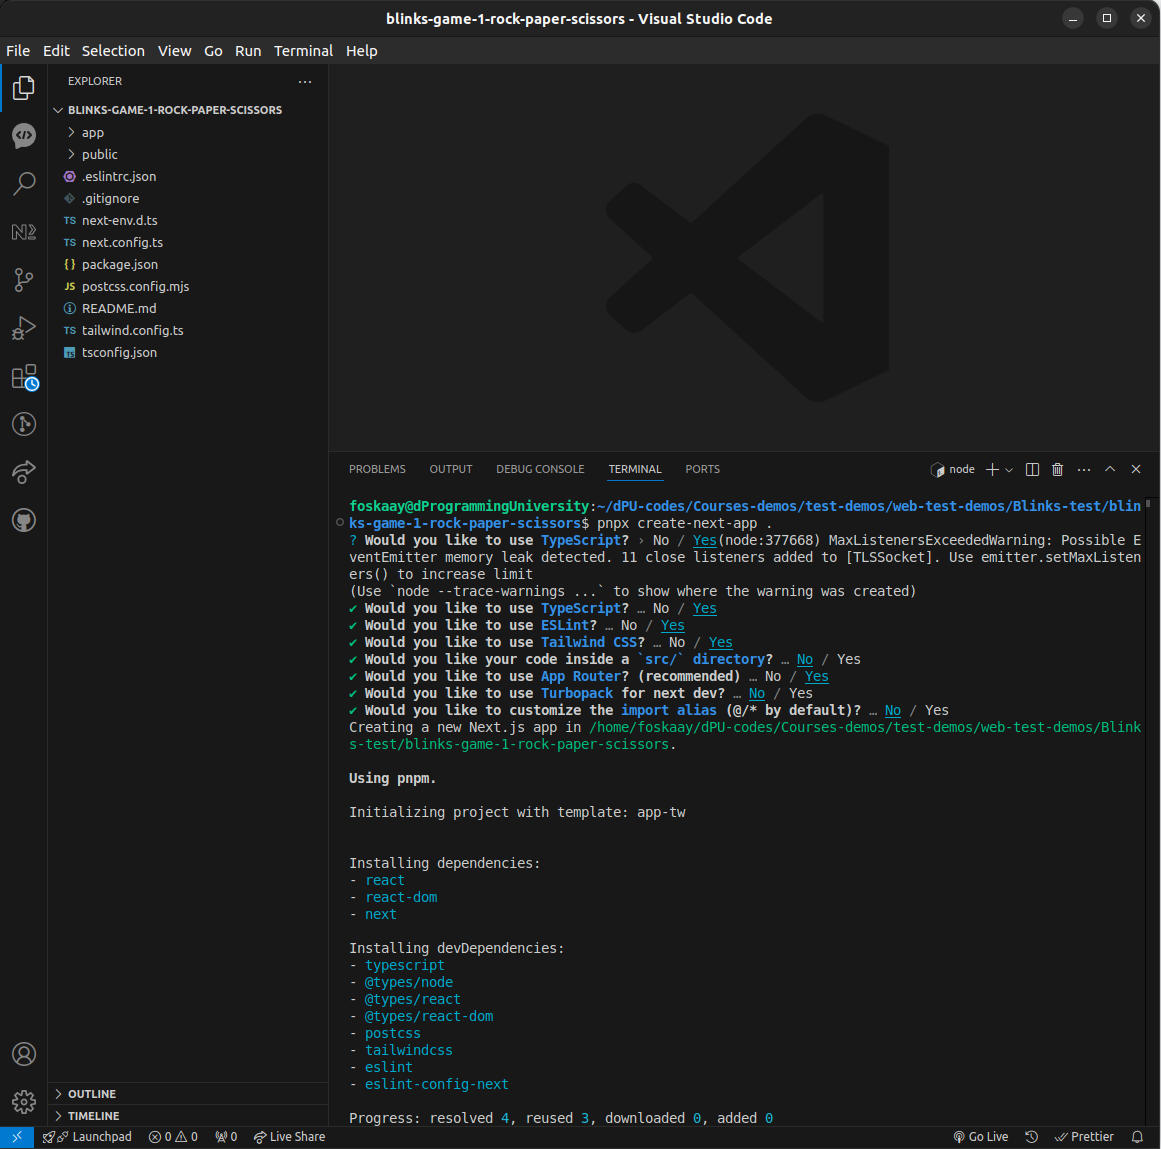
Then confirm all packages installed with the command:
pnpm iYou should see something like this in your terminal:
Lockfile is up to date, resolution step is skipped
Already up to date
Done in 651ms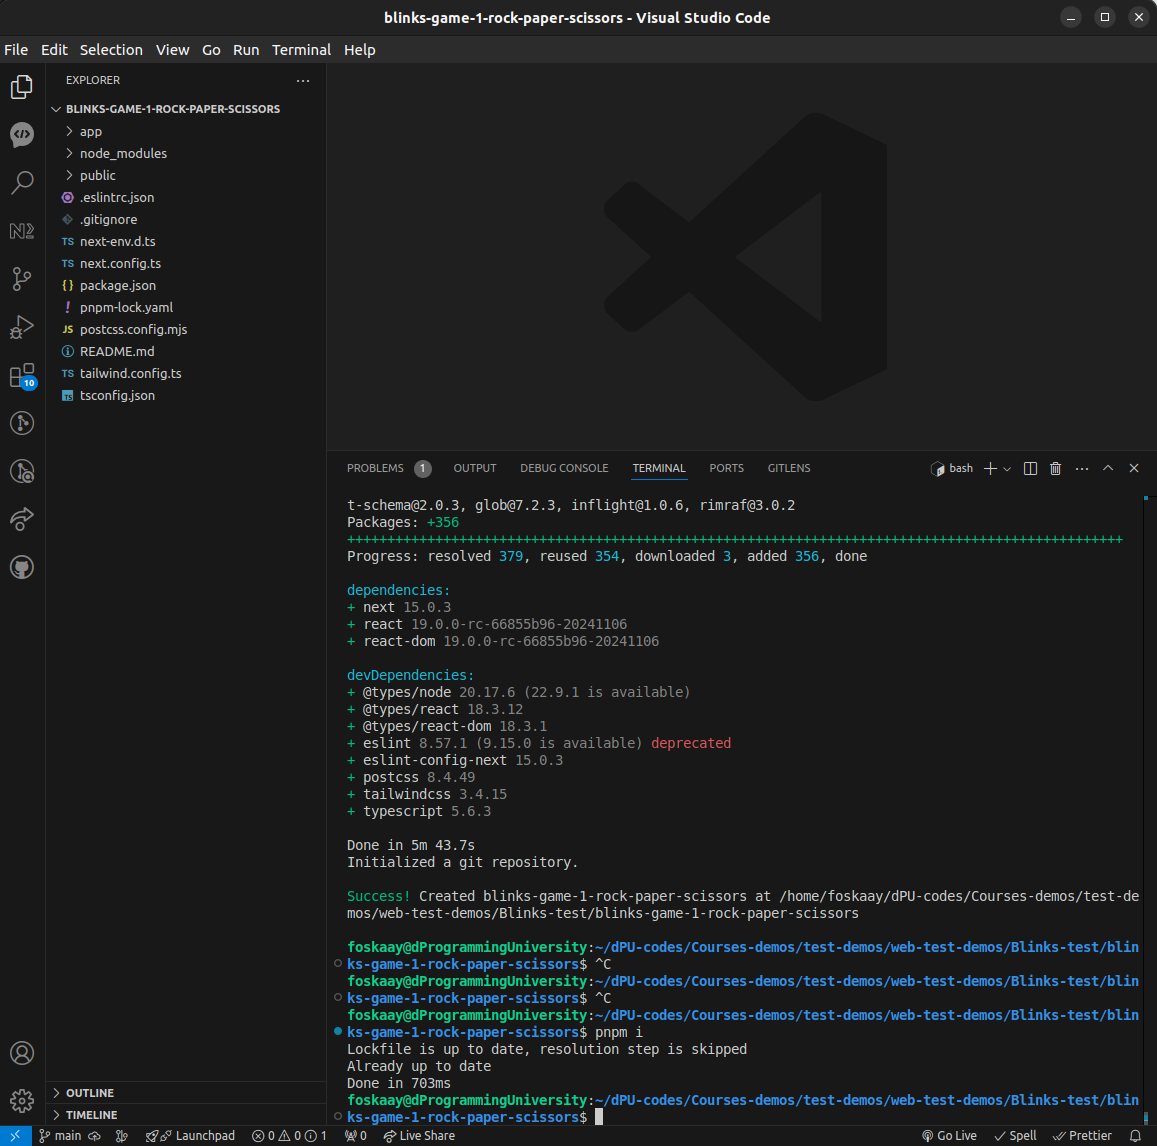
Run the Nextjs “blinks-game-1-rock-paper-scissors” project dev server to preview it with the command (open second terminal “Terminal 2”):
pnpm devOpen the project in your browser:
http://localhost:3000

(if this port is busy)
it will use other available ports like

http://localhost:3001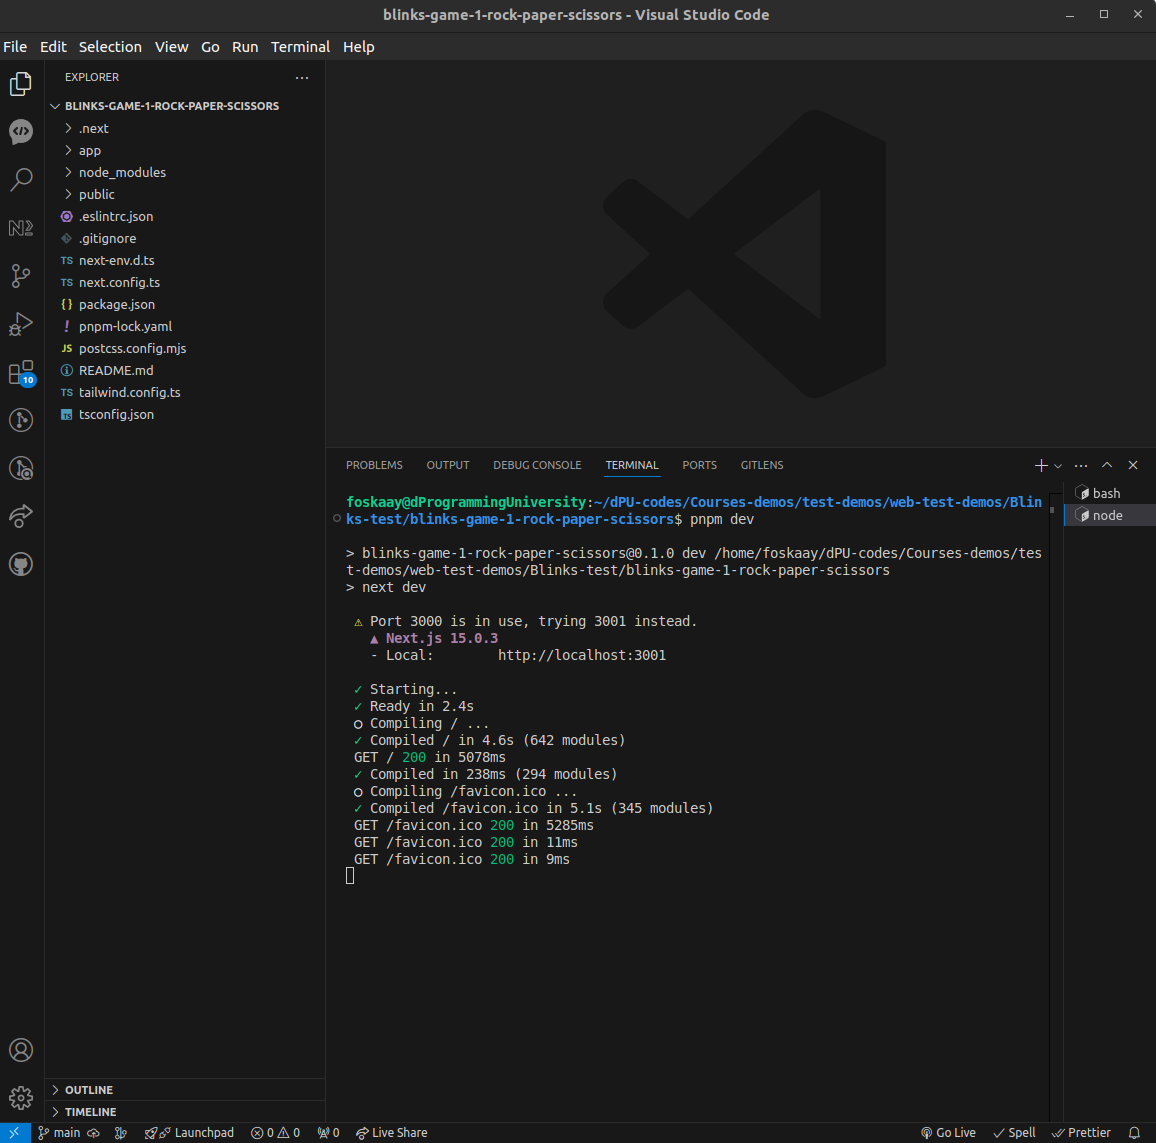
NOTE:
Moving forward, kindly leave “Terminal 2” running the “pnpm dev” server as above and continue to use “Terminal 1” for other commands below to ensure you don’t have to kill the server and restart multiple times to install other packages.
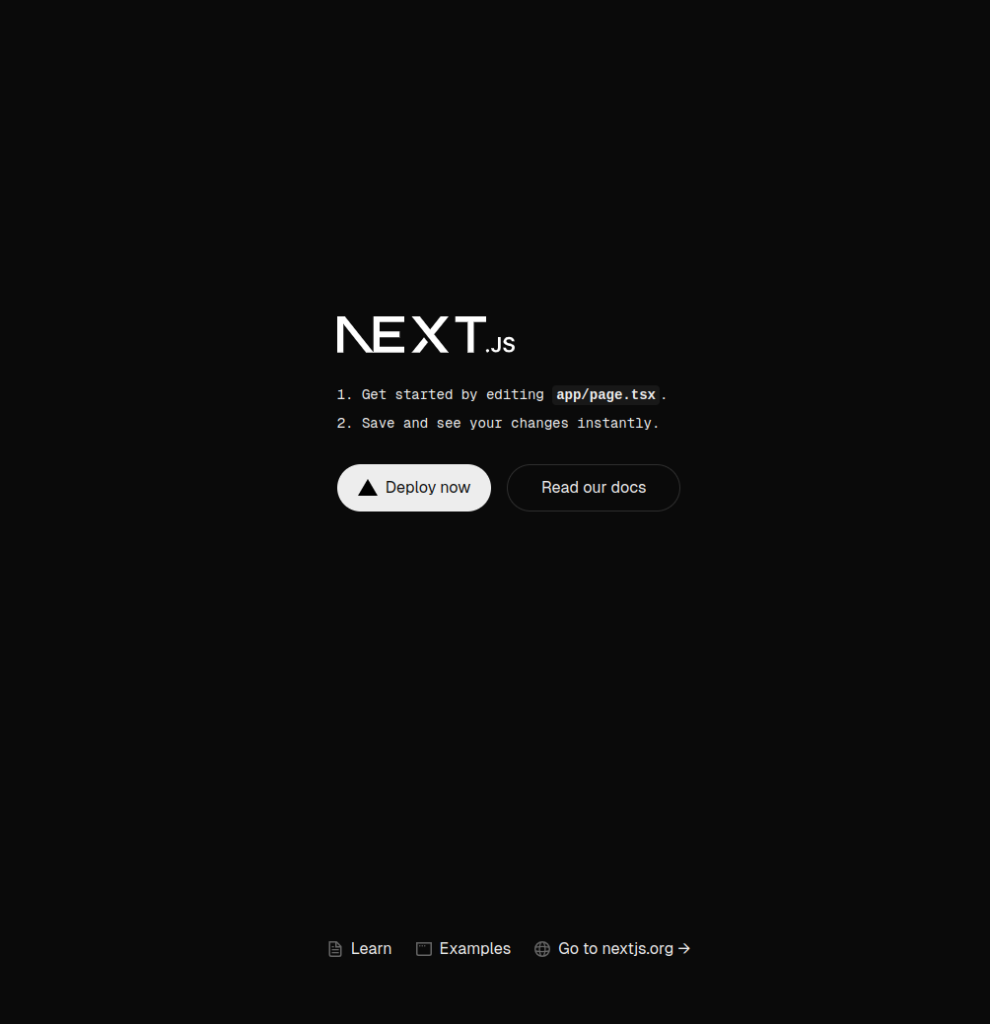
For now, you should have the default Nextjs page loaded (if error, kindly ensure this is fixed before proceeding to the next steps)
7.0 Install Essential Node Packages For Rock Paper Scissors (RPS) Game Blinks Development
Before we move on, there are other essential node packages that need to be installed as follows:
- Solana Web3.js
- Solana Actions
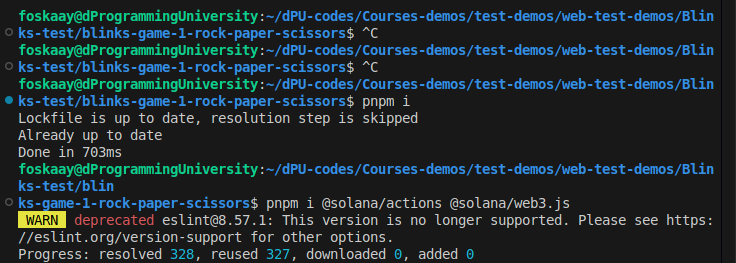
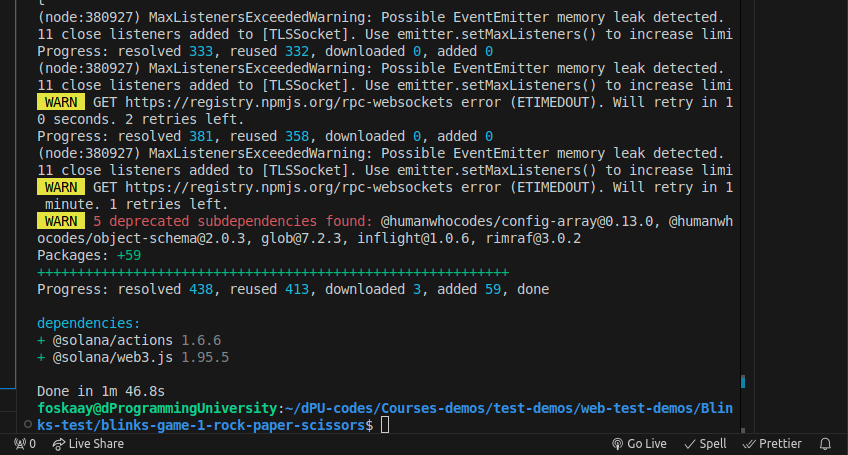
You can install the packages above with the following commands:
pnpm i @solana/actions @solana/web3.js
8.0 Turn Nextjs App To Rock Paper Scissors (RPS) Game Blinks dApp
Yeah, let’s transform our Nextjs app into a Rock Paper Scissors (RPS) Game Blinks,
8.1 Building The RPS Game Blinks Actions API (Part 1: Game Play)
Yeah, it is time to build the game👩💻
8.1.1 Creating Basic Solana Actions RPS Blinks Game API Structure
First, create an API folder in the App directory:
/app/apiThen, create an Actions folder in the API directory:
/app/api/actionsThen, create the RPS game folder in the Actions directory:
/app/api/actions/rpsThen, create the RPS game Play folder in the RPS directory:
/app/api/actions/rps/playNote: Create a route.ts file in the “play” folder, it becomes:
/app/api/actions/rps/play/route.tsThen, create the RPS game Reward folder in the RPS directory:
/app/api/actions/rps/rewardNote: Create a route.ts file in the “reward” folder, it becomes:
/app/api/actions/rps/reward/route.tsYou will end up with an API routes folder and file structures like the screenshot below:
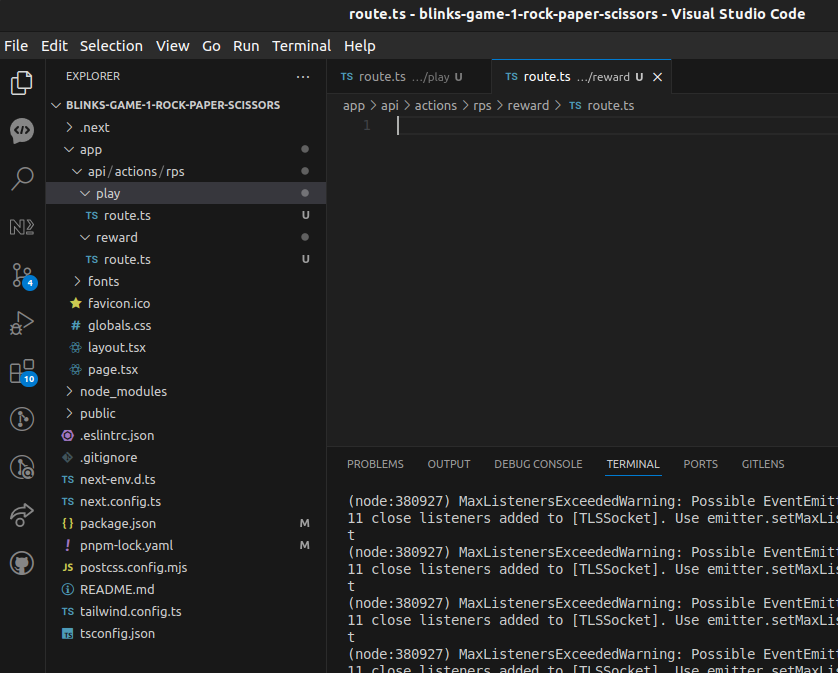
For now, let us focus on building the game API route first.
So, the focus folder will be:
/app/api/actions/rps/play/route.tsYou can now import necessary things from the Solana Actions and Web3.js packages we installed previously in the “/app/api/actions/rps/play/route.ts”:
// /app/api/actions/rps/play/route.ts
import {
    ActionGetResponse,
    ActionPostRequest,
    ActionPostResponse,
    ACTIONS_CORS_HEADERS,
    createPostResponse,
    MEMO_PROGRAM_ID,
} from "@solana/actions";
import {
    clusterApiUrl,
    Connection,
    LAMPORTS_PER_SOL,
    PublicKey,
    SystemProgram,
    Transaction,
    TransactionInstruction,
} from "@solana/web3.js";

const headers = ACTIONS_CORS_HEADERS;

// Game wallet to receive/send SOL
const GAME_WALLET = new PublicKey('FuRxfPnmfQ7RjKobbXdm7bs4VFT4DXXR3t7wC8dc4zb2');
Your code editor will surely be screaming at you, Hell Yeah!❤️🔥
No worries😟, we will calm it down as we create more features and use the imports through our API code.
8.1.2 Implementing RPS Blinks Game API GET Request
Yeah, let’s continue by implementing the Blinks Game API GET Request with some game logic code.
add the following code below the existing one:
// Helper function to determine winner
function determineWinner(playerMove: string, botMove: string): 'win' | 'lose' | 'draw' {
    if (playerMove === botMove) return 'draw';

    if (
        (playerMove === 'R' && botMove === 'S') ||
        (playerMove === 'P' && botMove === 'R') ||
        (playerMove === 'S' && botMove === 'P')
    ) {
        return 'win';
    }

    return 'lose';
}

// Generate bot move
function generateBotMove(): string {
    const moves = ['R', 'P', 'S'];
    return moves[Math.floor(Math.random() * moves.length)];
}

// GET Request Code
export const GET = async (req: Request) => {
    const payload: ActionGetResponse = {
        title: "Rock Paper Scissors",
        icon: new URL("/RPS-game-image-001.jpeg", new URL(req.url).origin).toString(),
        description: "Let's play Rock Paper Scissors! If you win you get DOUBLE your betted SOL, if it's a tie you get your betted SOL back, and if you lose you lose your betted SOL.",
        label: "Play RPS",
        links: {
            actions: [
                {
                    label: "Play!",
                    href: `${req.url}?amount={amount}&choice={choice}&opponent={opponent}`,
                    type: 'transaction',
                    parameters: [
                        {
                            type: "select",
                            name: "amount",
                            label: "Bet Amount in SOL",
                            required: true,
                            options: [
                                { label: "0.01 SOL", value: "0.01" },
                                { label: "0.1 SOL", value: "0.1" },
                                { label: "1 SOL", value: "1" }
                            ]
                        },
                        {
                            type: "radio",
                            name: "choice",
                            label: "Choose your move",
                            required: true,
                            options: [
                                { label: "Rock", value: "R" },
                                { label: "Paper", value: "P" },
                                { label: "Scissors", value: "S" }
                            ]
                        },
                        {
                            type: "radio",
                            name: "opponent",
                            label: "Choose your opponent",
                            required: true,
                            options: [
                                { label: "Bot (Instant prize)", value: "bot" },
                                { label: "Friend (Multiplayer- NotAvailableNow)", value: "friend" }
                            ]
                        }
                    ]
                }
            ]
        }
    };

    return Response.json(payload, { headers });
};
8.1.3 Adding OPTIONS Handler To RPS Blinks Game API
Next is creating an essential “OPTIONS” for blinks preflight checks:
// OPTIONS Code
export const OPTIONS = async (req: Request) => {
return new Response(null, { headers });
};
You will likely have a screaming IDE status like mine below now :
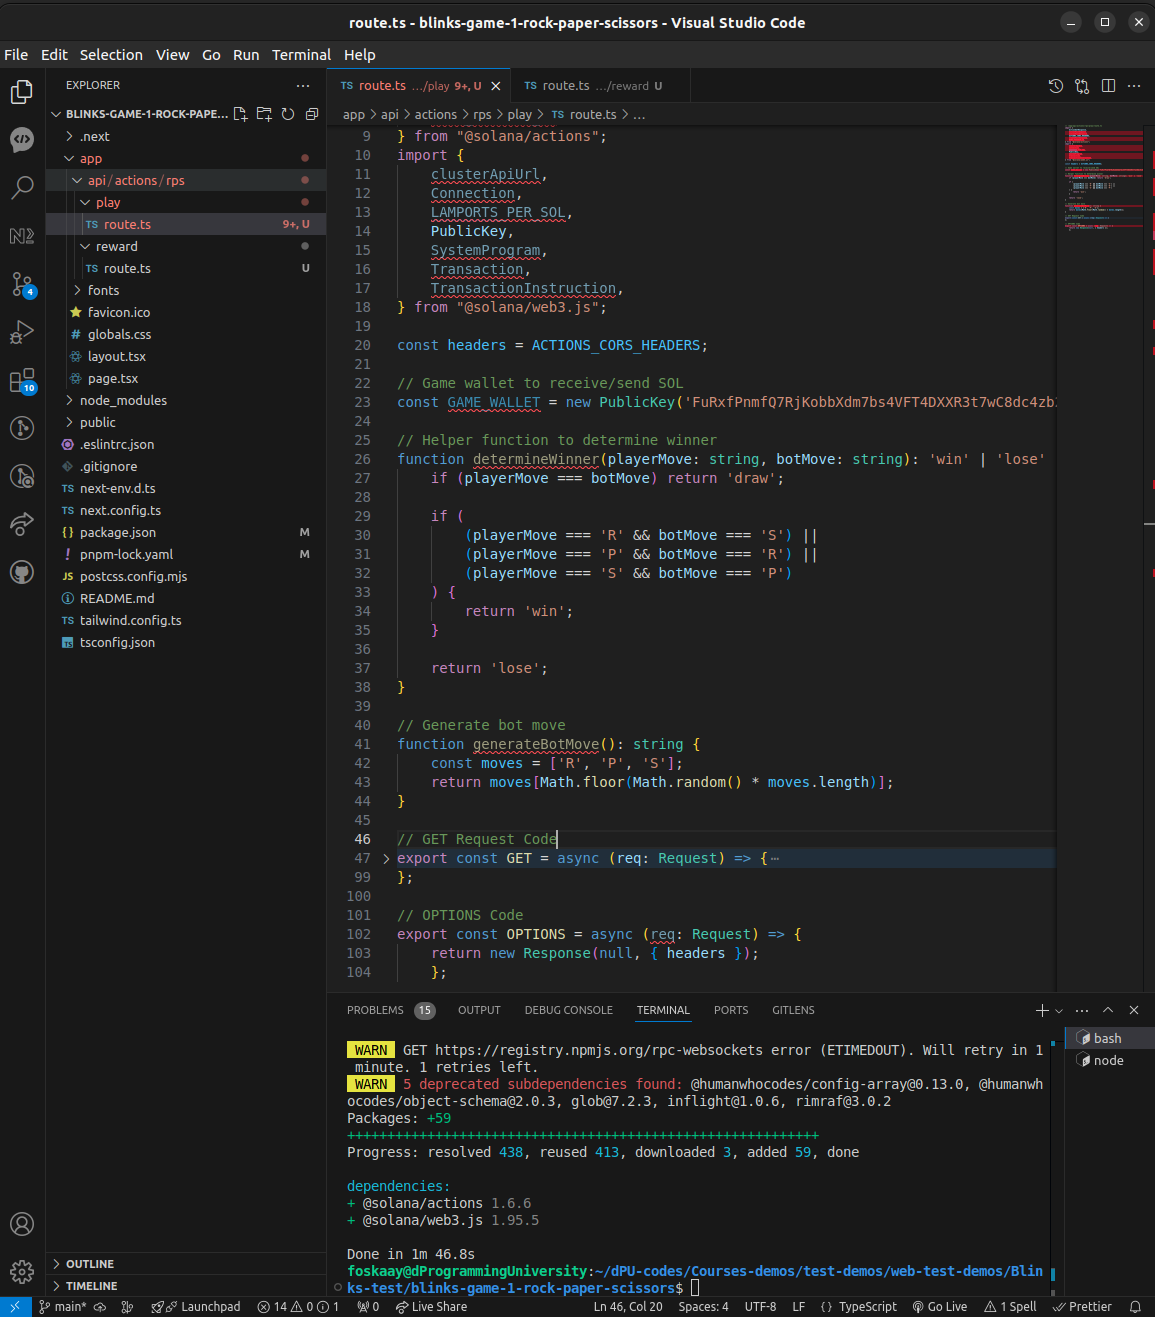
8.1.4 Building RPS Blinks Game API POST Request (Stage 1)
8.1.4.1 Building POST Request (Input Validation)
Let us move on by creating the POST request code for the Blinks gameplay API route endpoint.
// POST Request Code
export const POST = async (req: Request) => {
    try {
        const url = new URL(req.url);
        const amount = parseFloat(url.searchParams.get('amount') || '0');
        const choice = url.searchParams.get('choice');
        const opponent = url.searchParams.get('opponent');
        const body: ActionPostRequest = await req.json();

        // Validate inputs
        if (!amount || amount <= 0) {
            return Response.json({ error: 'Invalid bet amount' }, {
                status: 400,
                headers
            });
        }

        if (!choice || !['R', 'P', 'S'].includes(choice)) {
            return Response.json({ error: 'Invalid move choice' }, {
                status: 400,
                headers
            });
        }

        if (!opponent || !['bot', 'friend'].includes(opponent)) {
            return Response.json({ error: 'Invalid opponent choice' }, {
                status: 400,
                headers
            });
        }

        // Validate account
        let account: PublicKey;
        try {
            account = new PublicKey(body.account);
        } catch (err) {
            return Response.json({ error: 'Invalid account' }, {
                status: 400,
                headers
            });
        }
8.1.4.2 Building POST Request (Game Logic and Transaction)
We need to complete the POST request code above with the game logic and transaction code:
        const connection = new Connection(
            process.env.SOLANA_RPC || clusterApiUrl('devnet')
        );

        // Generate bot move and determine result
        const botMove = generateBotMove();
        const result = determineWinner(choice, botMove);

        // Create memo instruction with game details
        const memoInstruction = new TransactionInstruction({
            keys: [],
            programId: new PublicKey(MEMO_PROGRAM_ID),
            data: Buffer.from(
                `RPS Game | Player: ${choice} | Bot: ${botMove} | Result: ${result} | Amount: ${amount} SOL`,
                'utf-8'
            ),
        });

        // Create payment instruction
        const paymentInstruction = SystemProgram.transfer({
            fromPubkey: account,
            toPubkey: GAME_WALLET,
            lamports: amount * LAMPORTS_PER_SOL,
        });

        // Get latest blockhash
        const { blockhash } = await connection.getLatestBlockhash();

        // Create transaction
        const transaction = new Transaction()
            .add(memoInstruction)
            .add(paymentInstruction);

        transaction.feePayer = account;
        transaction.recentBlockhash = blockhash;

        // Create response using createPostResponse helper
        const payload: ActionPostResponse = await createPostResponse({
            fields: {
                type: 'transaction',
                transaction,
                message: `Game played! Your move: ${choice}, Bot's move: ${botMove}, Result: ${result}`,
                links: {
                    next: {
                        type: "post",
                        href: "/api/actions/rps/reward",
                    },
                },
            },
        });

        return Response.json(payload, { headers });

    } catch (err) {
        console.error(err);
        return Response.json({
            error: typeof err === 'string' ? err : 'Internal server error'
        }, {
            status: 500,
            headers
        });
    }
};
8.1.5 FULL CODE: RPS Blinks Game API Route Endpoint Full Code With Blinks Action Chaining (Post Method In Nextjs)
Here is the full code, will suggest you copy-paste it over as am made some adjustments to fix some errors and introduce more things from previous codes.
NOTE:
(1) Add the image into the “public” folder in the project root file to reference it in the code as the blinks game image:

(2) Change the wallet address from the demo address used to your own Solana game wallet address.
// /app/api/actions/rps/play/route.ts
import {
    ActionGetResponse,
    ActionPostRequest,
    ActionPostResponse,
    createActionHeaders,
    createPostResponse,
    ActionError,
    MEMO_PROGRAM_ID,
} from "@solana/actions";
import {
    clusterApiUrl,
    Connection,
    LAMPORTS_PER_SOL,
    PublicKey,
    SystemProgram,
    Transaction,
    TransactionInstruction,
} from "@solana/web3.js";

// create the standard headers for this route (including CORS)
const headers = createActionHeaders({
    chainId: 'devnet',
    actionVersion: '2.2.1',
  });

// Game wallet to receive/send SOL
const GAME_WALLET = new PublicKey('FuRxfPnmfQ7RjKobbXdm7bs4VFT4DXXR3t7wC8dc4zb2');


// Helper function to determine winner
function determineWinner(playerMove: string, botMove: string): 'win' | 'lose' | 'draw' {
    if (playerMove === botMove) return 'draw';

    if (
        (playerMove === 'R' && botMove === 'S') ||
        (playerMove === 'P' && botMove === 'R') ||
        (playerMove === 'S' && botMove === 'P')
    ) {
        return 'win';
    }

    return 'lose';
}

// Generate bot move
function generateBotMove(): string {
    const moves = ['R', 'P', 'S'];
    return moves[Math.floor(Math.random() * moves.length)];
}

export const GET = async (req: Request) => {
    const payload: ActionGetResponse = {
        title: "Rock Paper Scissors",
        icon: new URL("/RPS-game-image-001.jpeg", new URL(req.url).origin).toString(),
        description: "Let's play Rock Paper Scissors! If you win you get DOUBLE your betted SOL, if it's a tie you get your betted SOL back, and if you lose you lose your betted SOL.",
        label: "Play RPS",
        links: {
            actions: [
                {
                    label: "Play!",
                    href: `${req.url}?amount={amount}&choice={choice}&opponent={opponent}`,
                    type: 'transaction',
                    parameters: [
                        {
                            type: "select",
                            name: "amount",
                            label: "Bet Amount in SOL",
                            required: true,
                            options: [
                                { label: "0.01 SOL", value: "0.01" },
                                { label: "0.1 SOL", value: "0.1" },
                                { label: "1 SOL", value: "1" }
                            ]
                        },
                        {
                            type: "radio",
                            name: "choice",
                            label: "Choose your move",
                            required: true,
                            options: [
                                { label: "Rock", value: "R" },
                                { label: "Paper", value: "P" },
                                { label: "Scissors", value: "S" }
                            ]
                        },
                        {
                            type: "radio",
                            name: "opponent",
                            label: "Choose your opponent",
                            required: true,
                            options: [
                                { label: "Bot (Instant prize)", value: "bot" },
                                { label: "Friend (Multiplayer- NotAvailableNow)", value: "friend" }
                            ]
                        }
                    ]
                }
            ]
        }
    };

    return Response.json(payload, { headers });
};


//   OPTIONS Code
// DO NOT FORGET TO INCLUDE THE `OPTIONS` HTTP METHOD
// THIS WILL ENSURE CORS WORKS FOR BLINKS
export const OPTIONS = async () => {
    return new Response(null, { headers });
};


//   POST Request Code
export const POST = async (req: Request) => {
    try {
        const url = new URL(req.url);
        const amount = parseFloat(url.searchParams.get('amount') || '0');
        const choice = url.searchParams.get('choice');
        const opponent = url.searchParams.get('opponent');
        const body: ActionPostRequest = await req.json();

        // Validate inputs
        if (!amount || amount <= 0) {
            return Response.json({ error: 'Invalid bet amount' }, {
                status: 400,
                headers
            });
        }

        if (!choice || !['R', 'P', 'S'].includes(choice)) {
            return Response.json({ error: 'Invalid move choice' }, {
                status: 400,
                headers
            });
        }

        if (!opponent || !['bot', 'friend'].includes(opponent)) {
            return Response.json({ error: 'Invalid opponent choice' }, {
                status: 400,
                headers
            });
        }

        // Validate account
        let account: PublicKey;
        try {
            account = new PublicKey(body.account);
        } catch (err) {
            console.error(err);
            return Response.json({ error: 'Invalid account' }, {
                status: 400,
                headers
            });
        }

        const connection = new Connection(
            process.env.SOLANA_RPC || clusterApiUrl('devnet')
        );

        // Generate bot move and determine result
        const botMove = generateBotMove();
        const result = determineWinner(choice, botMove);

        // Create memo instruction with game details to record onchain
        const memoInstruction = new TransactionInstruction({
            keys: [],
            programId: new PublicKey(MEMO_PROGRAM_ID),
            data: Buffer.from(
                `RPS Game | Player: ${choice} | Bot: ${botMove} | Result: ${result} | Amount: ${amount} SOL`,
                'utf-8'
            ),
        });

        // Create payment instruction
        const paymentInstruction = SystemProgram.transfer({
            fromPubkey: account,
            toPubkey: GAME_WALLET,
            lamports: amount * LAMPORTS_PER_SOL,
        });

        // Get latest blockhash
        const { blockhash } = await connection.getLatestBlockhash();

        // Create transaction
        const transaction = new Transaction()
            .add(memoInstruction) // Add memo to transaction to record game play onchain
            .add(paymentInstruction); // Actual transaction

        transaction.feePayer = account;
        transaction.recentBlockhash = blockhash;

        // Create response using createPostResponse helper
        // Chain to reward route if win/draw
        const payload: ActionPostResponse = await createPostResponse({
            fields: {
                type: 'transaction',
                transaction,
                message: `Game played! Your move: ${choice}, Bot's move: ${botMove}, Result: ${result}`,
                links: {
                    //     /**
                    //      * this `href` will receive a POST request (callback)
                    //      * with the confirmed `signature`
                    //      *
                    //      * you could also use query params to track whatever step you are on
                    //      */
                        next: {
                          type: "post",
                          href: "/api/actions/rps/reward",
                        },
                      },
            },
        });

        return Response.json(payload, { headers });

    } catch (err) {
        console.error(err);
        const actionError: ActionError = {
            message: typeof err === 'string' ? err : 'Internal server error'
        };
        return Response.json(actionError, {
            status: 500,
            headers
        });
    }
};
8.2 Reward System: Building The RPS Game Blinks Reward Actions API
While creating the game “play” API route, we already created the “reward” API route too and its time to fix it code connected to the game play endpoint with the help of Blinks action chaining.
Here is the full code for that:
// /app/api/actions/rps/reward/route.ts
import {
    createActionHeaders,
    NextActionPostRequest,
    ActionError,
    CompletedAction,
    MEMO_PROGRAM_ID
} from "@solana/actions";
import {
    clusterApiUrl,
    Connection,
    PublicKey,
    SystemProgram,
    Transaction,
    TransactionInstruction,
    LAMPORTS_PER_SOL,
    Keypair,
} from "@solana/web3.js";

// Create headers for this route (including CORS)
const headers = createActionHeaders({
    chainId: 'devnet',
    actionVersion: '2.2.1',
});

// Load and initialize game wallet
let gameWallet: Keypair;
try {
    const privateKeyString = process.env.GAME_WALLET_PRIVATE_KEY;
    if (!privateKeyString) {
        throw new Error('GAME_WALLET_PRIVATE_KEY not found in environment');
    }
    const privateKeyArray = JSON.parse(privateKeyString);
    const secretKey = Uint8Array.from(privateKeyArray);
    gameWallet = Keypair.fromSecretKey(secretKey);
    console.log('Game wallet initialized with public key:', gameWallet.publicKey.toBase58());
} catch (error) {
    console.error('Failed to initialize game wallet:', error);
    throw new Error('Game wallet initialization failed');
}

// GET Request Code
// Since this is a next action endpoint, GET is not supported
export const GET = async () => {
    return Response.json({ message: "Method not supported" } as ActionError, {
        status: 403,
        headers,
    });
};

// OPTIONS Code
export const OPTIONS = async () => Response.json(null, { headers });

// POST Request Code
export const POST = async (req: Request) => {
    try {
        const body: NextActionPostRequest = await req.json();

        // Validate account
        let account: PublicKey;
        try {
            account = new PublicKey(body.account);
        } catch (err) {
            console.error(err);
            return Response.json({ message: 'Invalid account' } as ActionError, {
                status: 400,
                headers
            });
        }

        const connection = new Connection(
            process.env.SOLANA_RPC || clusterApiUrl("devnet")
        );

        // Confirm the previous transaction
        const signature = body.signature;
        if (!signature) {
            throw 'Invalid "signature" provided';
        }

        const status = await connection.getSignatureStatus(signature);
        if (
            !status ||
            !status.value ||
            !status.value.confirmationStatus ||
            !['confirmed', 'finalized'].includes(status.value.confirmationStatus)
        ) {
            throw "Unable to confirm the transaction";
        }

        // Get transaction details to determine game result
        const transaction = await connection.getParsedTransaction(signature, "confirmed");
        if (!transaction?.meta?.logMessages) {
            throw "Unable to fetch transaction details";
        }

        // Parse game result from memo
        const memoLog = transaction.meta.logMessages.find(log => log.includes('RPS Game'));
        if (!memoLog) throw "Invalid game transaction";

        const result = memoLog.includes('Result: win') ? 'win' : memoLog.includes('Result: draw') ? 'draw' : 'lose';
        const amount = parseFloat(memoLog.match(/Amount: ([\d.]+) SOL/)?.[1] || '0');

        // Return completed action for losses
        if (result === 'lose') {
            const payload: CompletedAction = {
                type: "completed",
                title: "Game Over!",
                icon: new URL("/RPS-game-image-001.jpeg", new URL(req.url).origin).toString(),
                label: "Better luck next time!",
                description: "You lost this round. Try again!",
            };
            return Response.json(payload, { headers });
        }

        // Process reward for wins/draws
        const reward = result === 'win' ? amount * 2 : amount;
        const rewardTx = new Transaction().add(
            new TransactionInstruction({
                keys: [],
                programId: new PublicKey(MEMO_PROGRAM_ID),
                data: Buffer.from(`RPS Reward | ${result.toUpperCase()} | Sent ${reward} SOL`, 'utf-8'),
            }),
            SystemProgram.transfer({
                fromPubkey: gameWallet.publicKey,
                toPubkey: account,
                lamports: reward * LAMPORTS_PER_SOL,
            })
        );

        const { blockhash } = await connection.getLatestBlockhash();
        rewardTx.feePayer = gameWallet.publicKey;
        rewardTx.recentBlockhash = blockhash;
        rewardTx.sign(gameWallet);

        // Send the transaction
        const rawTransaction = rewardTx.serialize();
        const txId = await connection.sendRawTransaction(rawTransaction, {
            skipPreflight: false,
            preflightCommitment: "confirmed",
        });

        // Use the new transaction confirmation strategy
        await connection.confirmTransaction({
            signature: txId,
            blockhash,
            lastValidBlockHeight: (await connection.getLatestBlockhash()).lastValidBlockHeight
        }, "confirmed");

        const payload: CompletedAction = {
            type: "completed",
            title: result === 'win' ? "Congratulations!" : "It's a Draw!",
            icon: new URL("/RPS-game-image-001.jpeg", new URL(req.url).origin).toString(),
            label: "Reward Sent!",
            description: `${result === 'win' ? 'You won! ' : 'Game drawn! '}${reward} SOL has been sent to your wallet.`,
        };

        return Response.json(payload, { headers });
    } catch (err) {
        console.error(err);
        const actionError: ActionError = { message: "An unknown error occurred" };
        if (typeof err == "string") actionError.message = err;
        return Response.json(actionError, {
            status: 400,
            headers,
        });
    }
};
9.0 TESTING: Testing Your Rock Paper Scissors (RPS) Blinks Game
Yeah, now that you have your Rock Paper Scissors (RPS) Blinks Game ready, it is time to test.
But before we can test successfully, we have one more very important thing to do.
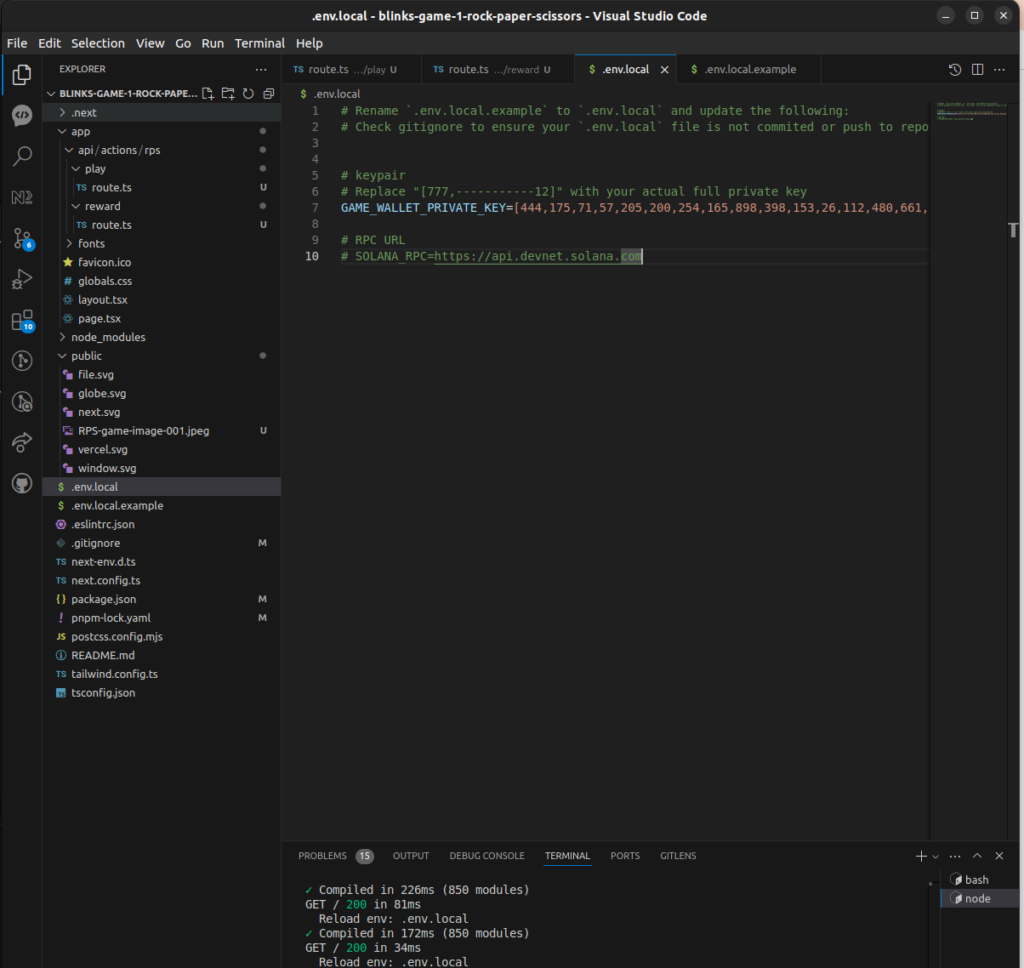
That is to set up the keypair private key (and since this is confidential data, the best option is to set up a .env.local file)
Create a new file “.env.local” in the root folder of our project and put the following code (And remember to never reveal your private key or seed phrase to anyone or push publicly via git commit):
# Rename `.env.local.example` to `.env.local` and update the following:
# Check gitignore to ensure your `.env.local` file is not commited or push to repo

# keypair
# Replace "[777,-----------12]" with your actual full private key
NEXT_PUBLIC_KEYPAIR=[777,-----------,12]

# RPC URL
# SOLANA_RPC=https://api.devnet.solana.com
9.1 Testing Blinks On Dialto Website
If you get previous codes correctly,
then you should now have a fully functioning Nextjs-powered Rock Paper Scissors (RPS) Blinks Game dApp that is ready to be unfurl into blinks:
STEP 1:
Go to Dialect’s Dial.to website
STEP 2:
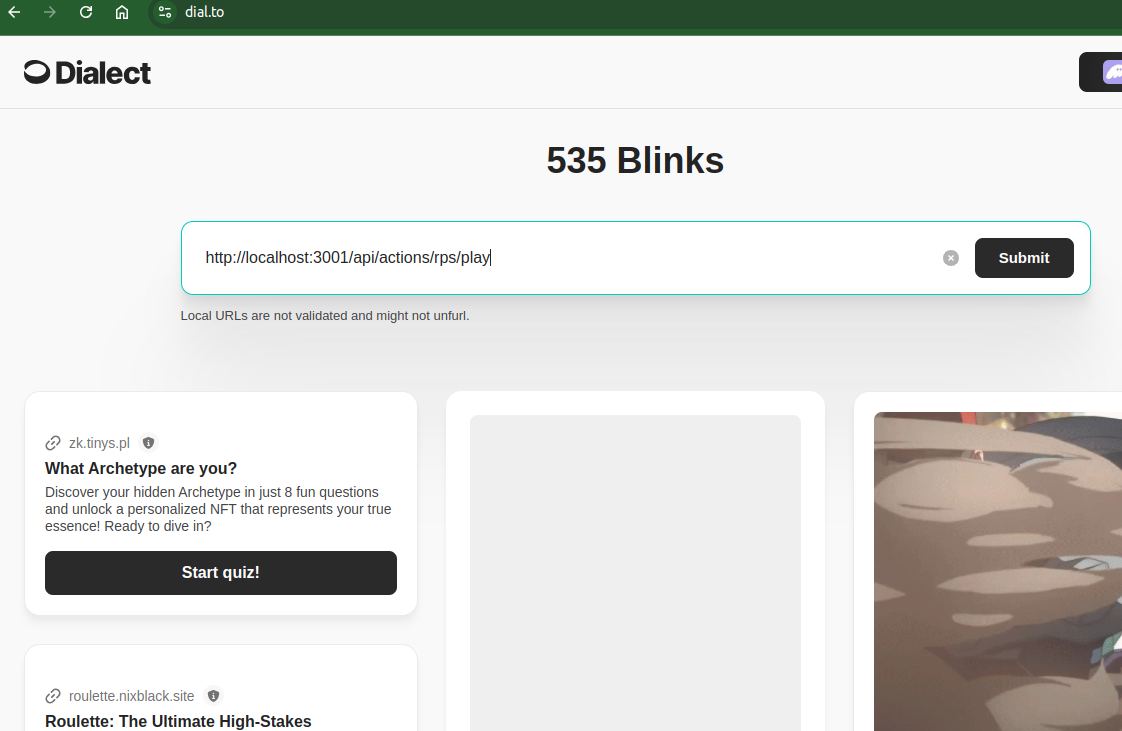
Paste your Solana actions API endpoint URL in the search box and click submit.
Ignore the “Local URLs are not validated and might not unfurl” error, that’s due to using a localhost URL.
STEP 3:
If no errors in your code, you should see this:
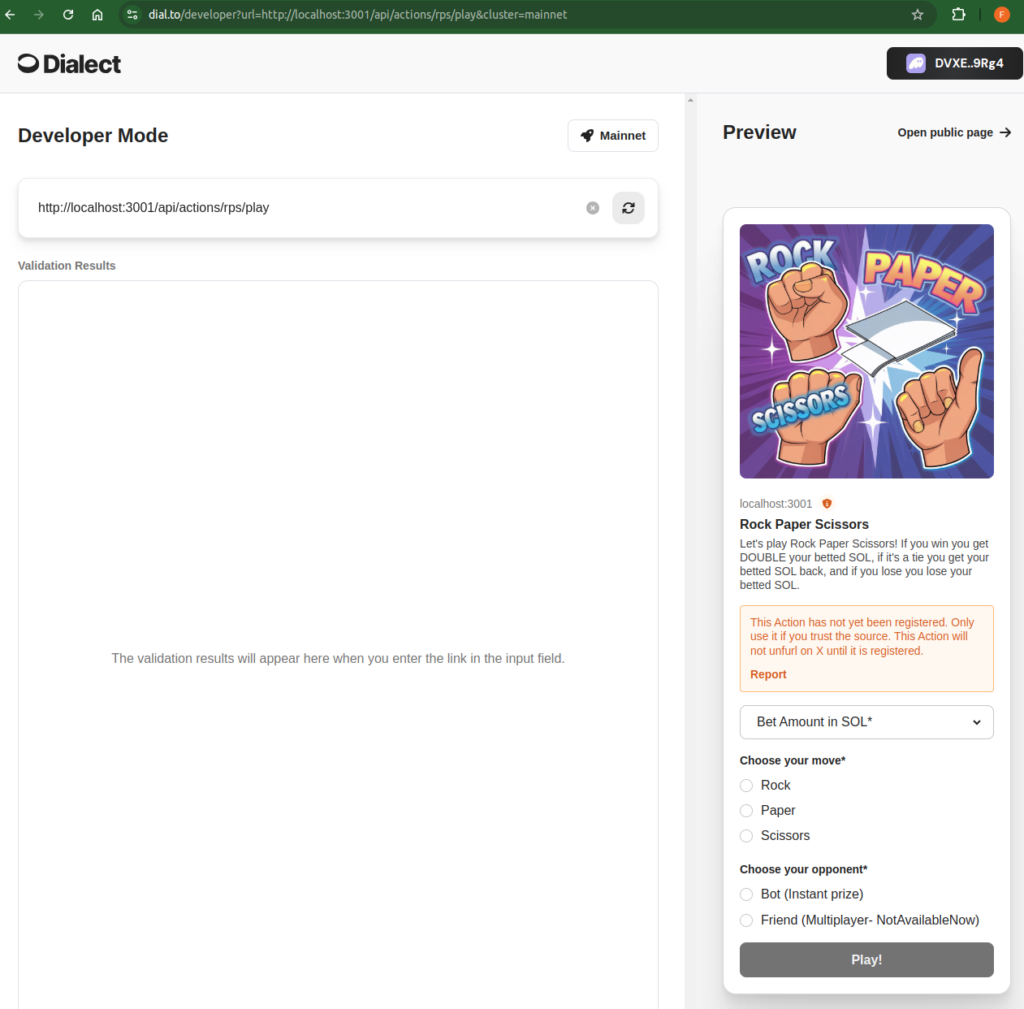
Connect Wallet for testing and try it out.
then you should have something like this:


9.2 Not Working? – GET HELP!
If not successful, it will display error messages.
Kindly take time to fix the error including checking your browser console.
If unable to solve the errors, you can share a link to your repo and a screenshot of the error as a comment below (Avoid posting code directly in the comment to prevent being perceived as spam)
10.0 PRODUCTION DEPLOYMENT: Deploy Your Rock Paper Scissors (RPS) Blinks Game
Considering the above is localhost, to make it available to verify with the Dialect registry and share with others, you need to host your Nexjs Rock Paper Scissors (RPS) Blinks Game dApp on platforms like Vercel.
I used Vercel to host this free as you can access the one I used as an example previously below:
Home: https://blinks-game-1-rock-paper-scissors.vercel.app/
RPS Blinks Game Solana Actions API Endpoint (Play): https://blinks-game-1-rock-paper-scissors.vercel.app/api/actions/rps/play
Dial.to RPS Blinks Game View: https://dial.to/developer?url=https%3A%2F%2Fblinks-game-1-rock-paper-scissors.vercel.app%2Fapi%2Factions%2Frps%2Fplay&cluster=devnet
Here are the steps I took for the production build (will suggest watching the video to see me execute each step below which will not be covered in this guide text version)
10.1 Create Repo And Push To GitHub
(1) Create a new EMPTY repo on GitHub:
blinks-game-1-rock-paper-scissors
(2) Add the repo URL as a remote URL in the project we have been developing locally using commands
git remote add origin https://github.com/dProgrammingUniversity/blinks-game-1-rock-paper-scissors
Reminder:
Kindly remember to replace the “dProgrammingUniversity” with your actual Github or you will get errors when try to push to it later.
(3) Add the existing local code to git with the command:
git status
git add .
(4) Commit the code with the command:
git commit -m "initial production commit"
(5) Push the commit from local git to your remote repo on GitHub with the command:
git push
If error, then follow the command outputted with the error, that is due to being the first time we are pushing to the remote repo and need to establish the connection.
git push --set-upstream origin main
(6) Confirm successful push to affirm that both the local and remote git are aligned without error or pending commits with the command:
git status
Hurray, we have successfully pushed to the repo
and set to deploy the production build of our RPS blinks game to ANY host
(am using Vercel but feel free to use other alternatives as you desire like Netlify, Render etc.)
NOTE:
Stuck? Then, kindly watch me do this step by step in the video.
10.2 Deploying Your RPS Game Blinks To Vercel
(1) Simply log in to your host (mine Vercel)
(2) Create new project
(3) Select the source as the GitHub repo for the project
(4) Next before finalizing the deployment is the ENV setup
NOTE:
Stuck? Then, kindly watch me do this step by step in the video.
10.1 Environment Setup (For Wallet Private Key Protection)
(1) Copy and paste the content of the .env.local file into the environment setup option. This ensures the private key for the game wallet for signing win/draw rewards transactions can be available to the RPS blinks game without exposing it to others.
(2) Save and continue with the deployment
If all goes well, you should have the deployment completed in a few minutes.
(3) Domain: Your deployed project will be assigned a free .vercel (or whatever platform you hosting with) subdomain name. Use it to visit the production site.
(4) Custom Domain: If needed, get a custom domain and assign it to the project.
REMINDER: It is now mandatory for Blinks registry approval to get a custom domain attached to your project for approval.
NOTE:
Stuck? Then, kindly watch me do this step by step in the video.
10.1 Testing Production Build
Just as we did earlier, just copy and paste the production build URL for the RPS “play” API endpoint into Dial.to website to test it out.
If all works fine, congrats
You can now proceed to submit for Blinks verification.
11.0 BLINKS VERIFICATION: Submitting Your RPS Game Solana Actions to the Official Blinks Registry
Yeah, now that you have your Solana actions successfully working as expected. There are essential steps to take which include hosting it live to move from the local host.
Then, you need to register it with the official Dialect Blinks registry or your actions link might not unfurl successfully on blinks-enabled platforms like X(Twitter).
There are 3 types of Blinks statuses:
- UnRegistered – Blinks not submitted for review by the official Blinks registry team for approval. This causes an orange-colored warning message to also appear to inform the users that your blinks might not be safe to interact with.
- Trusted – these are registered blinks, approved and added to the official Blinks registry and display white color with no error or warning message to users.
- Malicious – this is in red and of course, will likely not even unfurl on blinks-enabled platforms to protect users. And if the developer refers users to its actions directly on the Dial.to platform, it will inform users that this is malicious Blinks and dangerous to interact with it.
It is free and easier to do by following the steps below:
- Ensure your Solana actions work fine without issues
- Ensure your blinks actions conform to the specifications
- Ensure you host on a custom domain (to increase approval chance)
- Do not use sub-domains to host your actions site like “site.vercel.app”
- fill out the Solana Blinks registry application form (I got a response the same day but aim for 3 days to 1 week max for approval depending on the situation).
12.0 PROJECT REPOSITORY
The repo for the project done in this guide can be accessed below (
IMPORTANT NOTE: Please remember to give the repo a STAR⭐:
dPU Nextjs Rock Paper Scissors (RPS) Blinks Game dApp Codes Repo
13.0 GRANTS/BOUNTIES/HACKATHONS: Solana Blinks Grants And Bounties
11.1 How To Get Solana Blinks Grants, Bounty and Support for Developers
The Blinks ecosystem within Solana is growing rapidly and will likely soon be seeing Job vacancies for Solana Blinks developers.
Aside from that, there are multiple grants for Blinks you can try if you are doing any of the following relating to Blinks:
Note: Most grants, hackathons or bounties listed below might have closed when you check them, so kindly check the Dialect Solana Blinks platform for new active ones.
Also, you can comment below to alert me of new and current ones to add up to the list below.
- Building/Developing Blinks
- Building/Developing Blinks tools like Blinks List/Directory/Explorer (I Am building this, so feel free to submit your Blinks there to be featured for FREE)
- Blinks educational content for developers and non-developers
If you fit any of the above categories, then you can apply for any of the grants below (I will likely update the list as I get to discover more):
- Dialect x Superteam Solana Blinks Grant (72hours – 1 week response time – I got a response for this guide in less than 24hours after grant application submitted)
- Solana Foundation Actions and Blinks Grant: Under “Which funding category are you applying for?” choose “Actions and Blinks” – (1-3 months response time)
- Superteam Instagrants (72hours – 1 week response time)
14.0 EXERCISES
Do the following exercise to solidify your learning:
- Star and fork the above repo
- Clone to your PC
- Create a new branch
- Make changes (customize) image, custom UI Element of description, options displayed by the Blinks game.
- Push your changes to the “Main” branch of your own repo from the new branch – Don’t send PR to the dPU repo you forked above, instead push to your own “Main” branch of your forked version of the dPU repo above.
- Host it on Vercel, Netlify or any other of choice
- Kindly follow the submission steps below for me to check.
14.1 Submission:
Things to submit for review:
- Share your experience making those changes alongside learning Solana Blinks Game development through this guide.
- Share your hosted RPS Blinks Game dApp link and API route link on Vercel or other platforms.
- Share your forked repo link
Then, submit all the above details for a check as a comment under this post (do not post it in dPU discord or send me a DM, will not attend to such please).
Remember, after posting as a comment under this post, you can then send me a reminder in the dProgramming University discord server under the “Support” section above in the #Solana channel for me to check your submission ASAP.
15.0 CONCLUSION
It was an interesting ride and glad you made it to this point.
Congrats👏 once again and it’s time to take positive advantage of the opportunities opened up to developers with the introduction of Solana Blinks and grants to encourage and support devs.
WHAT NEXT?
I aim to create more Solana Blinks Development Episodes with intermediate and advanced Solana Blinks development content and share them in future guides with you.
Thus, kindly use the social media share button to share this guide if you have found it helpful or will be helpful to some developers in your social media sphere.
And join the discord to stay in the loop.
Thanks for your time, it’s been a wonderful ride with you all this while.
SOLOMON FOSKAAY
Founder, dProgramming University (dPU).
Twitter: SolomonFoskaay
DSCVR: SolomonFoskaay
16.00 REFERENCES
https://docs.dialect.to/documentation/actions/actions/action-chaining
https://github.com/dialectlabs/actions/blob/main/examples/hono/examples/chaining/inline/route.ts
https://github.com/solana-developers/solana-actions/tree/main/examples/next-js/src/app/api/actions
